Divblox APIs
Exposing a custom API
To expose any of your app's functionality as an api to the outside world, you simply need to create an endpoint in the following manner:
Create a new php script that will contain your API operations and save it to the folder "/project/api/".
Include "divblox.php" to use Divblox API classes.
require("../../divblox/divblox.php");
- Declare a new operation by calling the "addApiOperation()" function from the "PublicApi" class. The "Expected outputs", and "operation description" will be used when Divblox auto-generates the documentation for the newly created API, so do not overlook the importance of these description fields even though they don't directly effect functionality. The "User readable name" (API operation name) is later used to link operations to other API functionality.
PublicApi::addApiOperation(
["Function Name"],
["Input Parameters"],
["Expected Outputs"] ,
["User readable name"] ,
["API operation description"]);
- Initialize the API after your declarations using "initApi()" function from the "PublicApi" class.
PublicApi::initApi(
["API description"],
["API Title"]);
- Functionality is added to the API by adding functions with titles that correspond with the API Operation's "Function Name" parameter from step 3.
- Input parameters are retrieved using "getInputParameter()" along with the name of a parameter chosen in step 3.
- The API operation output is created using "addApiOutput()" for which there is no restriction to the amount of outputs you can have but should be inline with the operation deceleration's expected output.
- The API operation must be concluded by setting a return result to true or false, using "setApiResult(["Boolean"])", to say if the request was successful and by printing the response with "printApiResult()".
function ["Function Name"]() {
$Variable = PublicApi::getInputParameter(["Input Parameter"]);
// *** Add User Code Here ***
PublicApi::addApiOutput("The Value of variable is","$Variable");
PublicApi::setApiResult(["Boolean"]);
PublicApi::printApiResult();
}
- Using the steps provided a dummy operation has been created to demonstrate the creation and testing. The following API has an operation that concatenates a first and last name. A second operation, that shows the systems current time, is added to show how multiple operations and functions can occupy the same file. An example of a new API would look as follows:
require("../../divblox/divblox.php");
// Start by declaring your operations and then calling the initApi function
PublicApi::addApiOperation(
"dummyOperation",
["first_name",
"last_name"],
["Message" => "You called the example operation",
"FullName" => "[The resulting full name]"],
"Example Operation",
"This is simply an example api operation that takes a first name and a last name and concatenates them");
PublicApi::addApiOperation(
"dummyOperation2",
[],
["Message" => "Current system time is [system_time]"],
"Example Operation 2",
"A simple operation that returns the current system time");
PublicApi::initApi("Example API endpoint to illustrate the basics of divblox APIs","Example Endpoint");
// Operations
function dummyOperation() {
$Name = PublicApi::getInputParameter("first_name");
$Surname = PublicApi::getInputParameter("last_name");
PublicApi::addApiOutput("Message","You called the example operation.");
PublicApi::addApiOutput("FullName","$Name $Surname");
PublicApi::setApiResult(true); // You need to set this to true to indicate that the API executed successfully
PublicApi::printApiResult();
}
function dummyOperation2() {
PublicApi::addApiOutput("Message",
"Current system time is ".dxDateTime::Now()->format(DATE_TIME_FORMAT_PHP_STR.' H:i:s'));
PublicApi::setApiResult(true); // You need to set this to true to indicate that the API executed successfully
PublicApi::printApiResult();
}
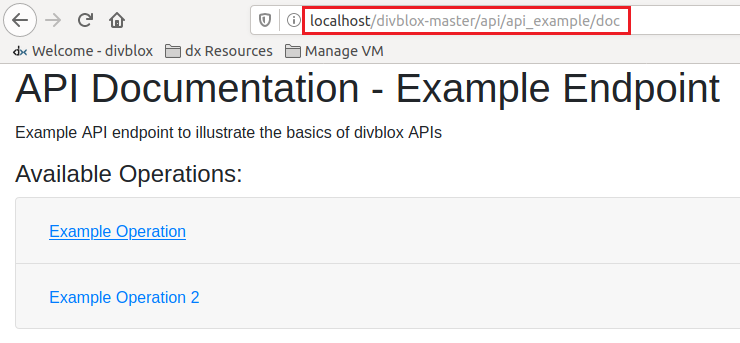
- Divblox provides comprehensive documentation for your API's that can be viewed at "/api/[your API name]/doc". In the case of this example, where our API is called "api_example", the documentation is generated and can be viewed at "/api/api_example/doc".
- By following this documentation the newly exposed API's operation can be accessed by making a request to the given URL endpoint.
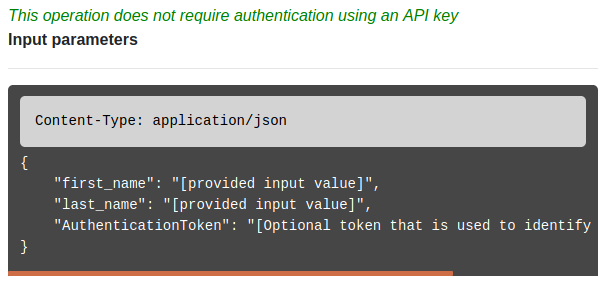
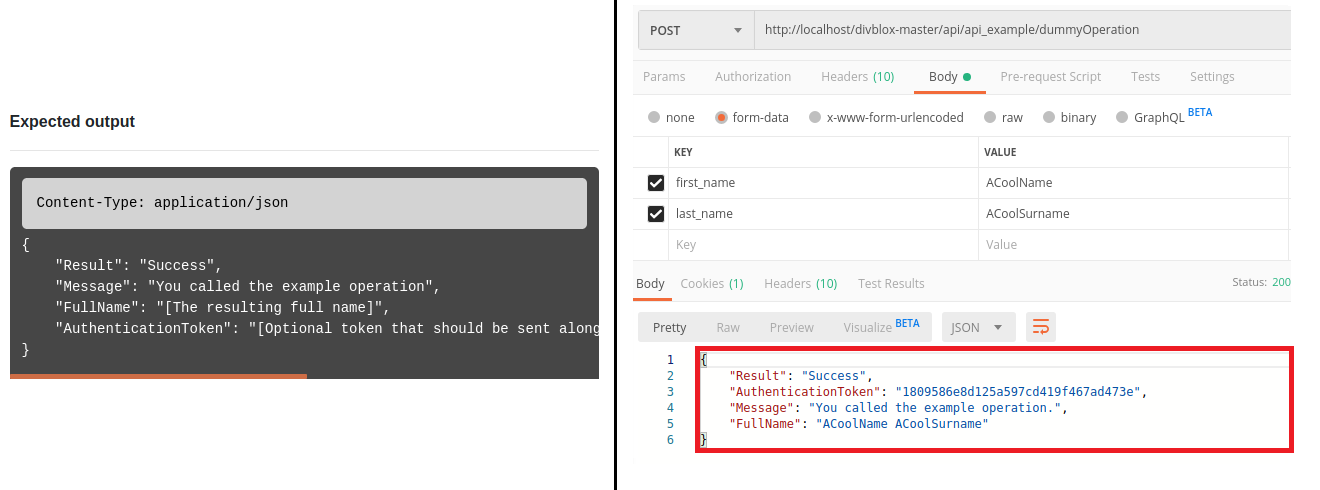
- The documentation will indicate to the reader whether or not the request requires an API key to access the operation, and in our case this API requires no authentication but does require other parameters such as a header, "content-type", and input parameters, "first_name" and "last_name", which are placed in the POST request body.

- After the request has been made the expected output should be inline with the expected output. Using an application, such as Postman as a test platform to see whether or not the API was successfully created, or alternatively by using the URL "/api/api_example/dummyOperation/first_name=ACoolName/last_name=ACoolSurname" we can compare the collected output to the expected response.
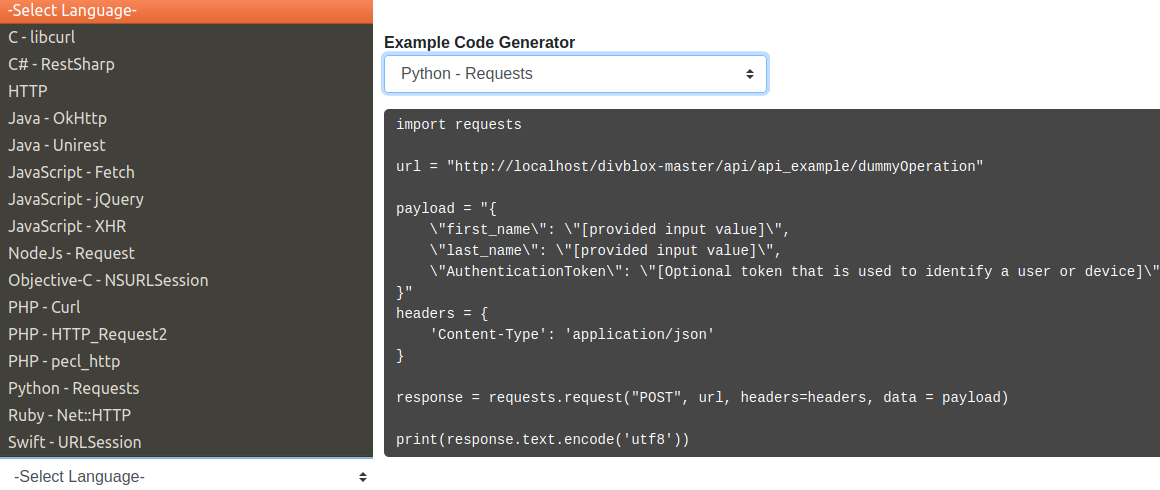
- Lastly , in the documentation, a dropdown menu is provided containing snippets of code that can be copied and placed into your project and language of choice to ease the integration. These snippets come in the most common languages that handle API requests.
Securing API operations with an API key
When creating your own API it will be completely exposed and wont require and API key to be accessed. To secure your API operations we can add them to the list of API operations that are under "api_operation_administration" and create a key to control its accessibility.
- Using the "api_example" (see Exposing an API) to demonstrate this. It is shown in the documentation that the custom API does not require a key which is what we want to change.
- Add the API operation to the list of controlled operations by opening "api_operation_administration" component in the "Component Builder".

- This component allows you to add or remove API operations from the list of access controlled API operations. Add your operation by clicking the "+ Api Operation"
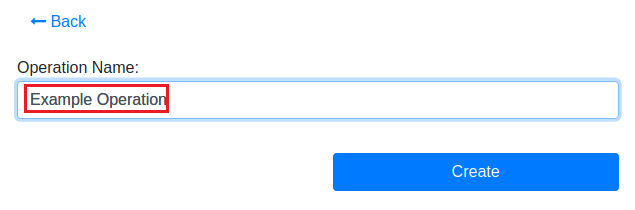
- Add the "User Readable Name" (API operation name)to the box and click "Create". This name is from your "addApiOperation()" (in your API's .php file) and is case and white space sensitive.

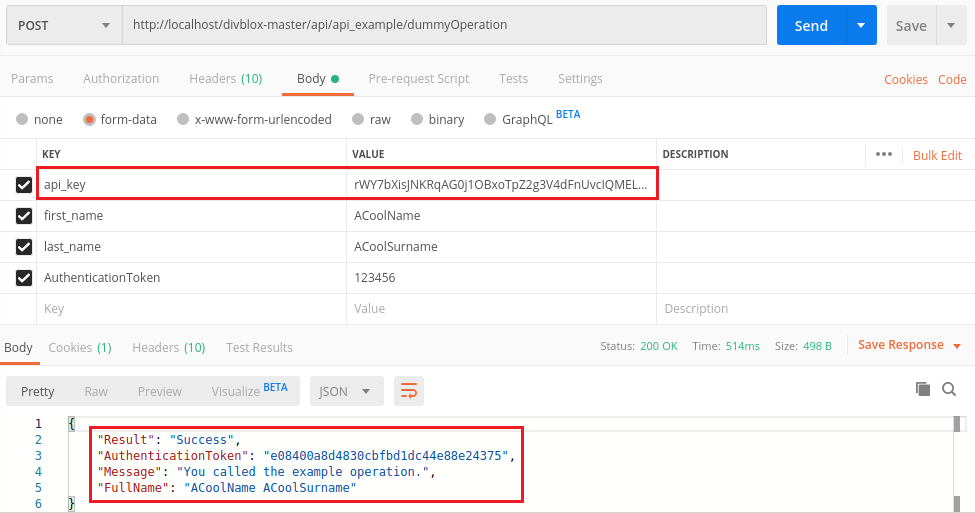
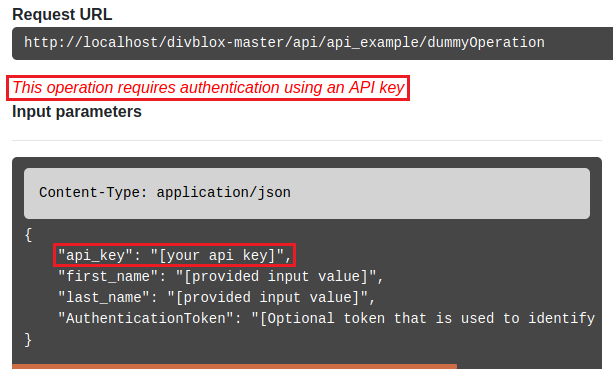
- By checking the API documentation we can compare the changes. Note that now the API does require a key to access the operation, and a API key can now be placed in the request body when the request is made to access the operation.
- To get a key that will link to your operation and allow you to access it, open the "api_key_administration" component from the "Component Builder" page and add a new API key by clicking the "+ API key".
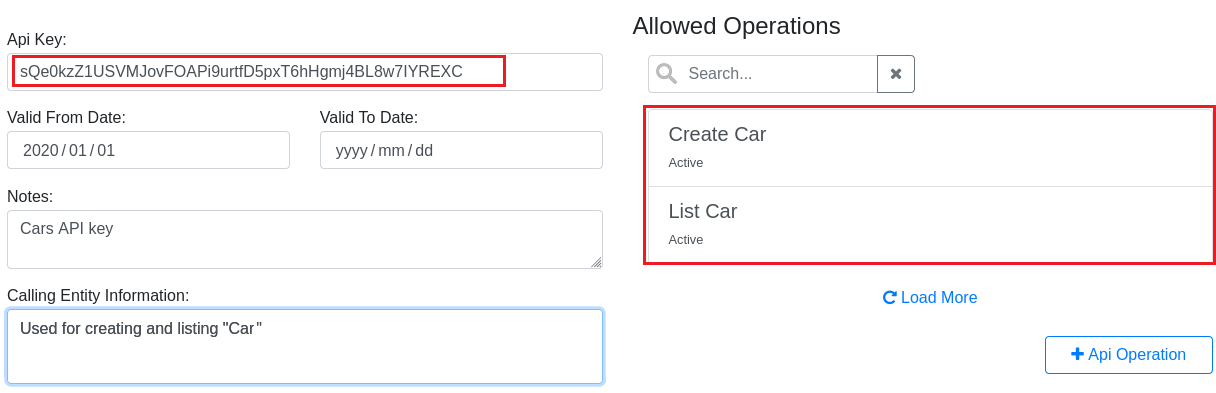
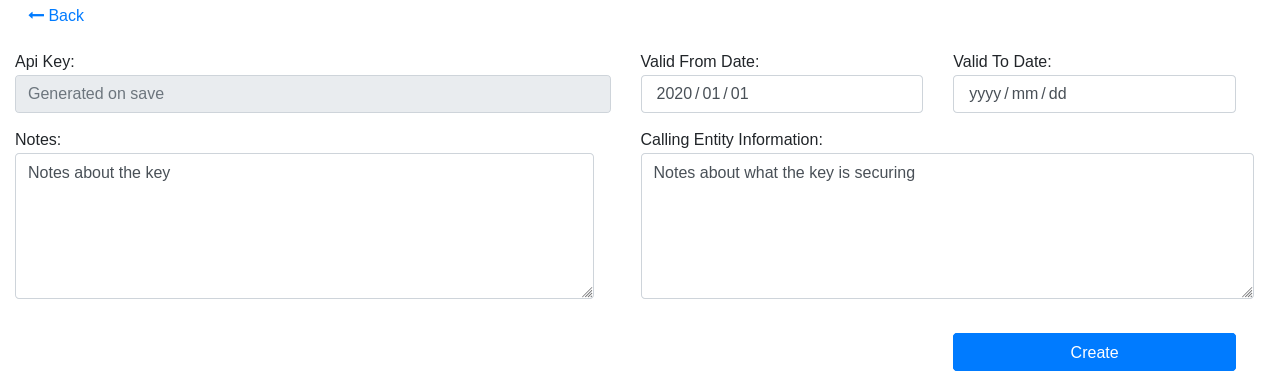
- The key itself is auto-generated to avoid any internal clashes, as well as providing a strong key string. A start date is required. The end date can be left open which results in the key remaining active indefinitely. Fill in any additional information you may require and click "Create" to finish making the key.

- Your newly generated key should be visible in the "api_key_administration" component. Open up the new key to start adding operations to this key.
- Start adding operations to this key by clicking "+ API Operation"

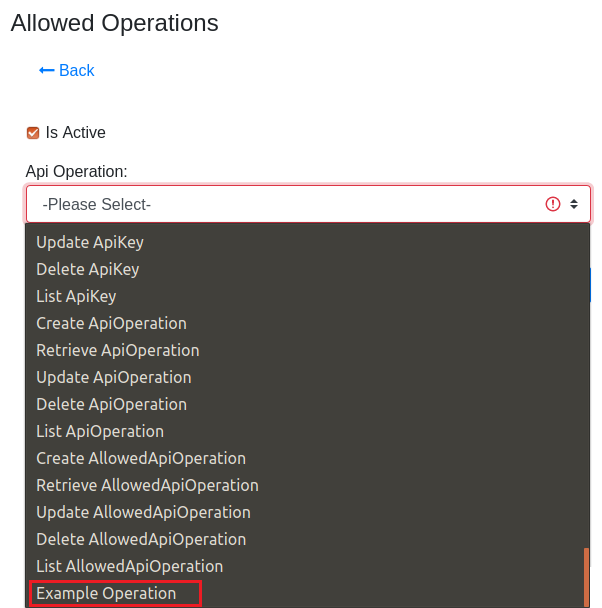
- Select the operation you want to link with the API key. Operations that have been newly added are place at the bottom of the list.

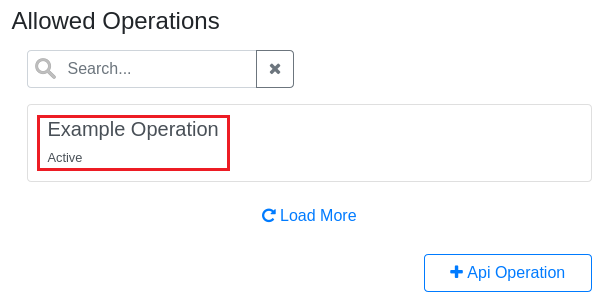
- To verify that the operation has been added, it should be visible when viewing the API key. It will show the activity status of the operation which can be toggled to manage access.
- Testing the API operation with the API key should complete the API operation and return a "success" status message.
Creating default CRUD API's
Making and exposing access controlled CRUD API operations for new data model entities.
- Open the "Data Modeler" from the Divblox setup page.
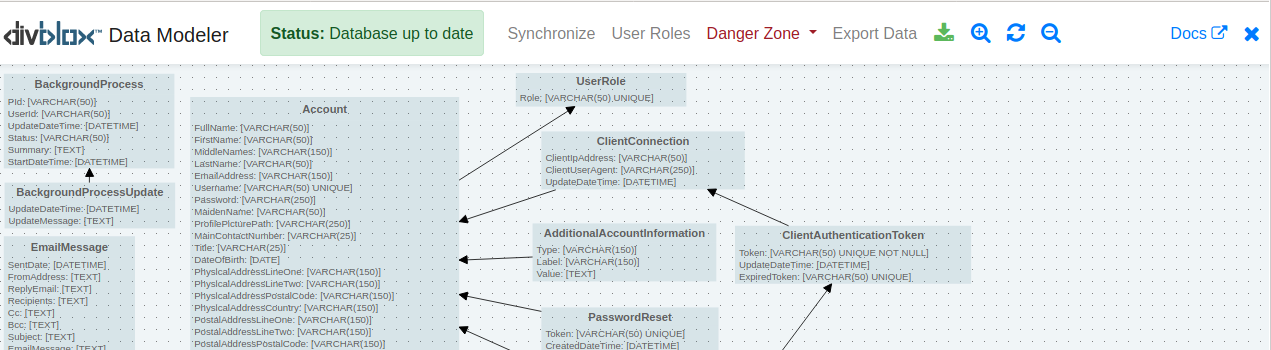
- This is the Default data model for Divblox. New Entities are added by "Double-clicking" in empty space.
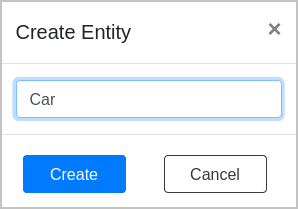
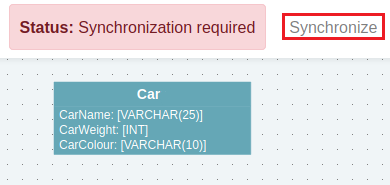
- Name your new data model entity and click "Create". The name of the data model entity is used as the CRUD API path as well. For this example an entity named "Car" will be created.
- Start by selecting the module where you want your new entity to be placed. Add new entity attributes by filling in the attribute "name" and "data type" and then add it with the green " + " at the end of the row. Add relationships in the same way, by selecting the entity you need a relationship with and add it using the green " + " at the end of the row. Finish by saving the changes made to the entity
- Sync your data model. Ensure that Divblox's data model is synced so that the CRUD operations can be used.

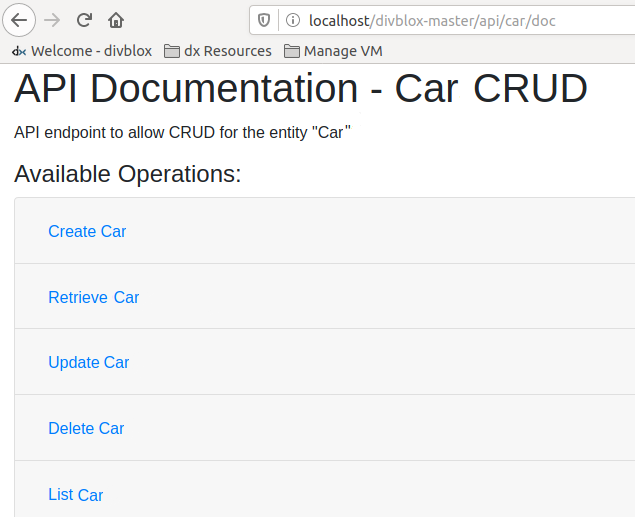
- View the auto-generated documentation for the newly created entity using the entity name from before and the path "/api/[your API name]/doc". These are the default CRUD operations that get created with new data model entities.
- Divblox automatically requires an API key for any auto generated operation as they get added and listed in "api_operation_adminstration" (For more see Securing API operations with an API key). Therefore we must create an API key and link it to the operations we want to expose, thus still keeping them secure with a key. Create the key in the "api_key_administration" component. Select the new key and add the operations using the " + Api Operation" button and select the operations you want from the drop down menu.
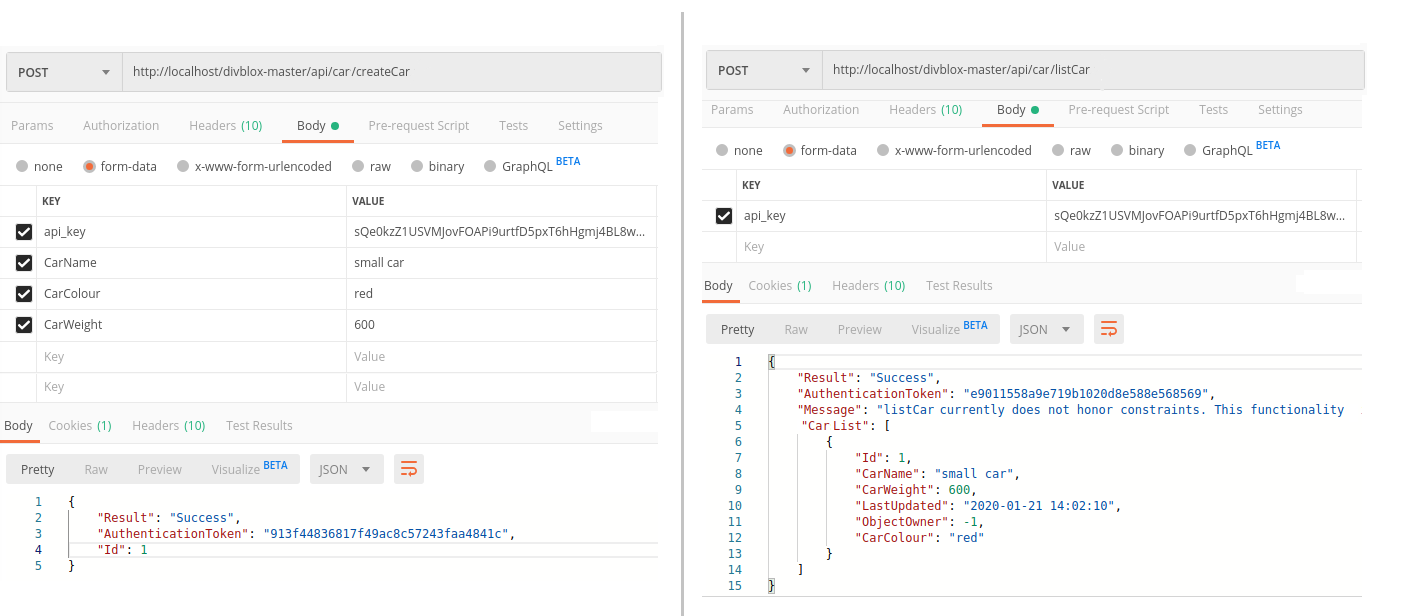
- The API operations are now exposed and can be accessed using the key that was just created. Testing the "Create Car" operation we will get back a confirmation that the data entry was successful and the "List Car" operation will show the new car that was created.