Configuration
In this section it is assumed that you have configured Divblox to function locally, either in the VM or natively. This includes having a local version of the base divblox public repo. It is also assumed that you have created a Divblox account.
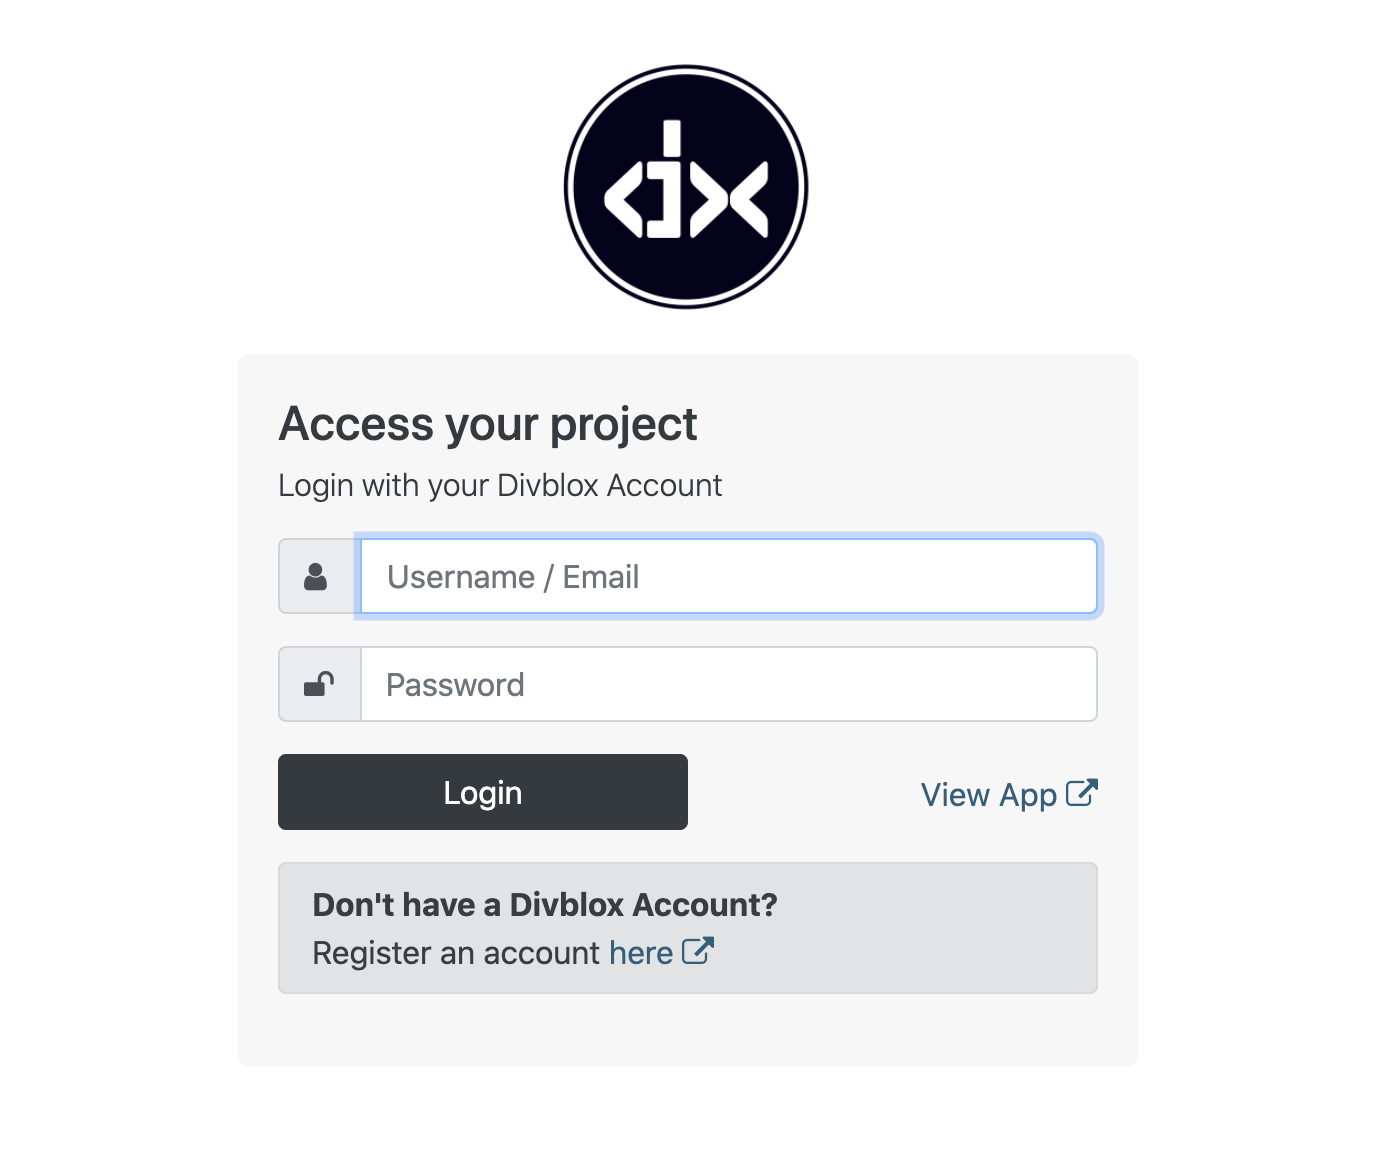
When navigating to your project root, usually at localhost/[project_name] you will be greeted by a login page.
These are the steps followed to initially configure your local project.
- Log In
- Project
- Environment
- Database
- Log in using your Divblox account
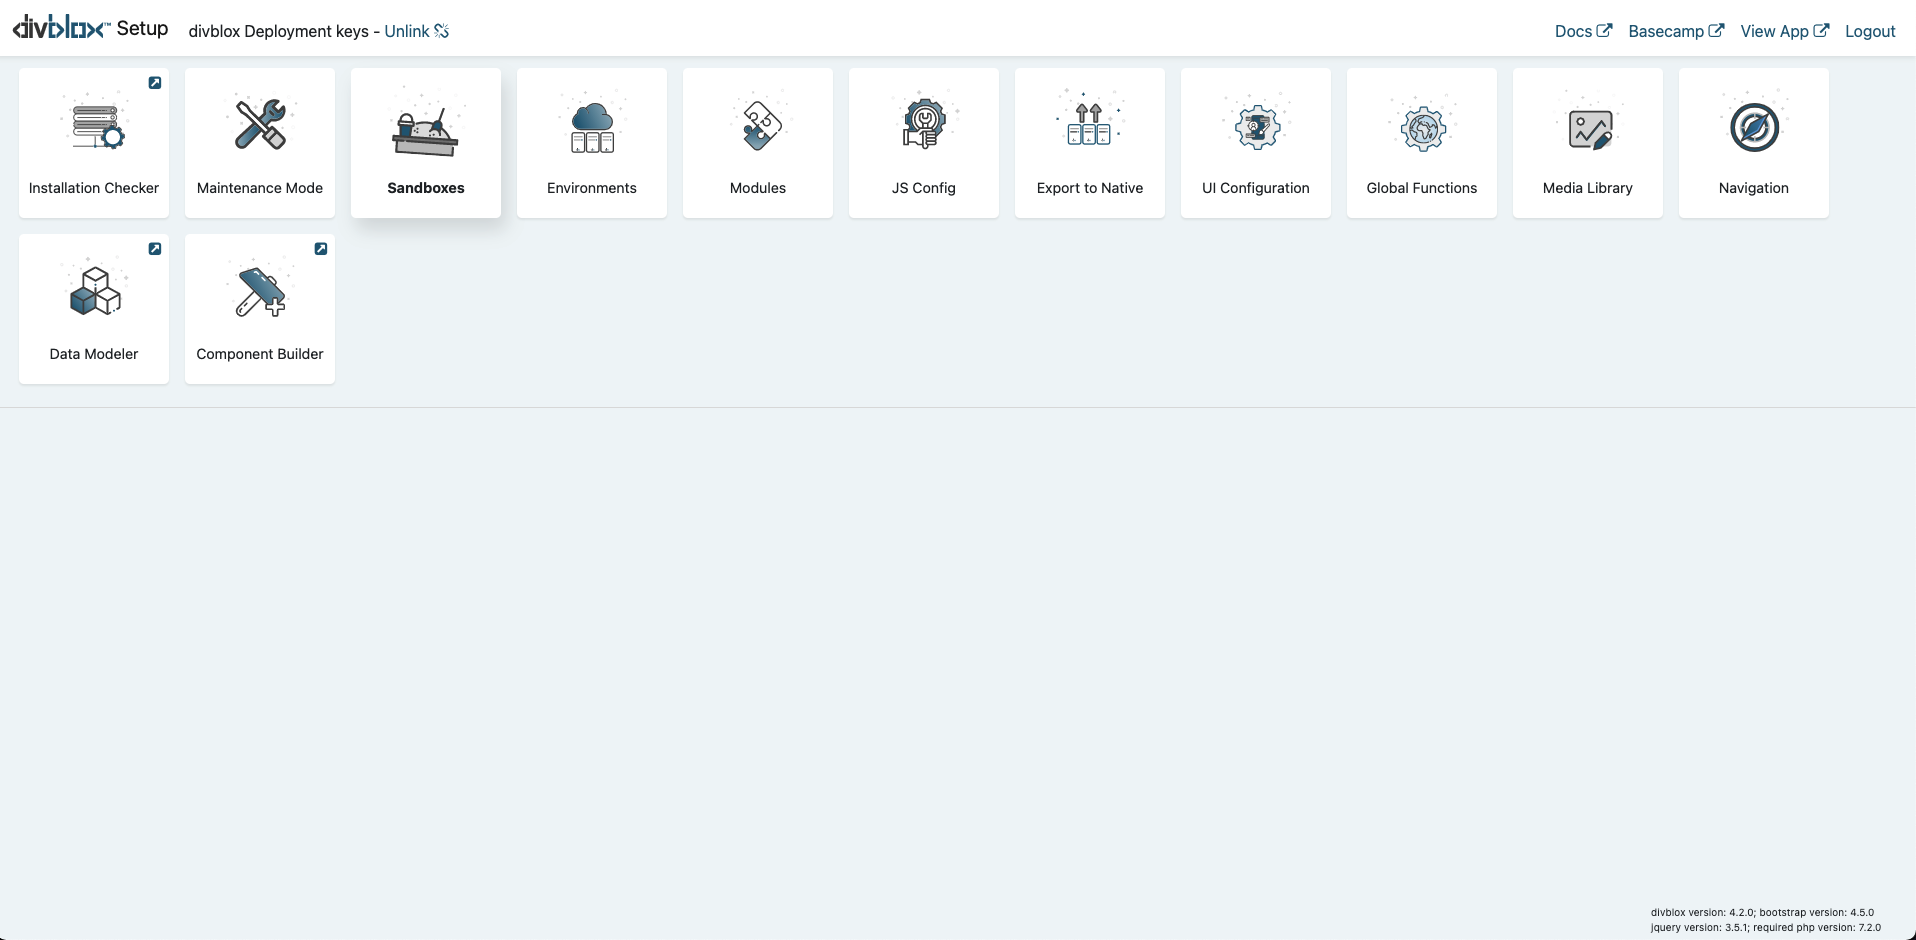
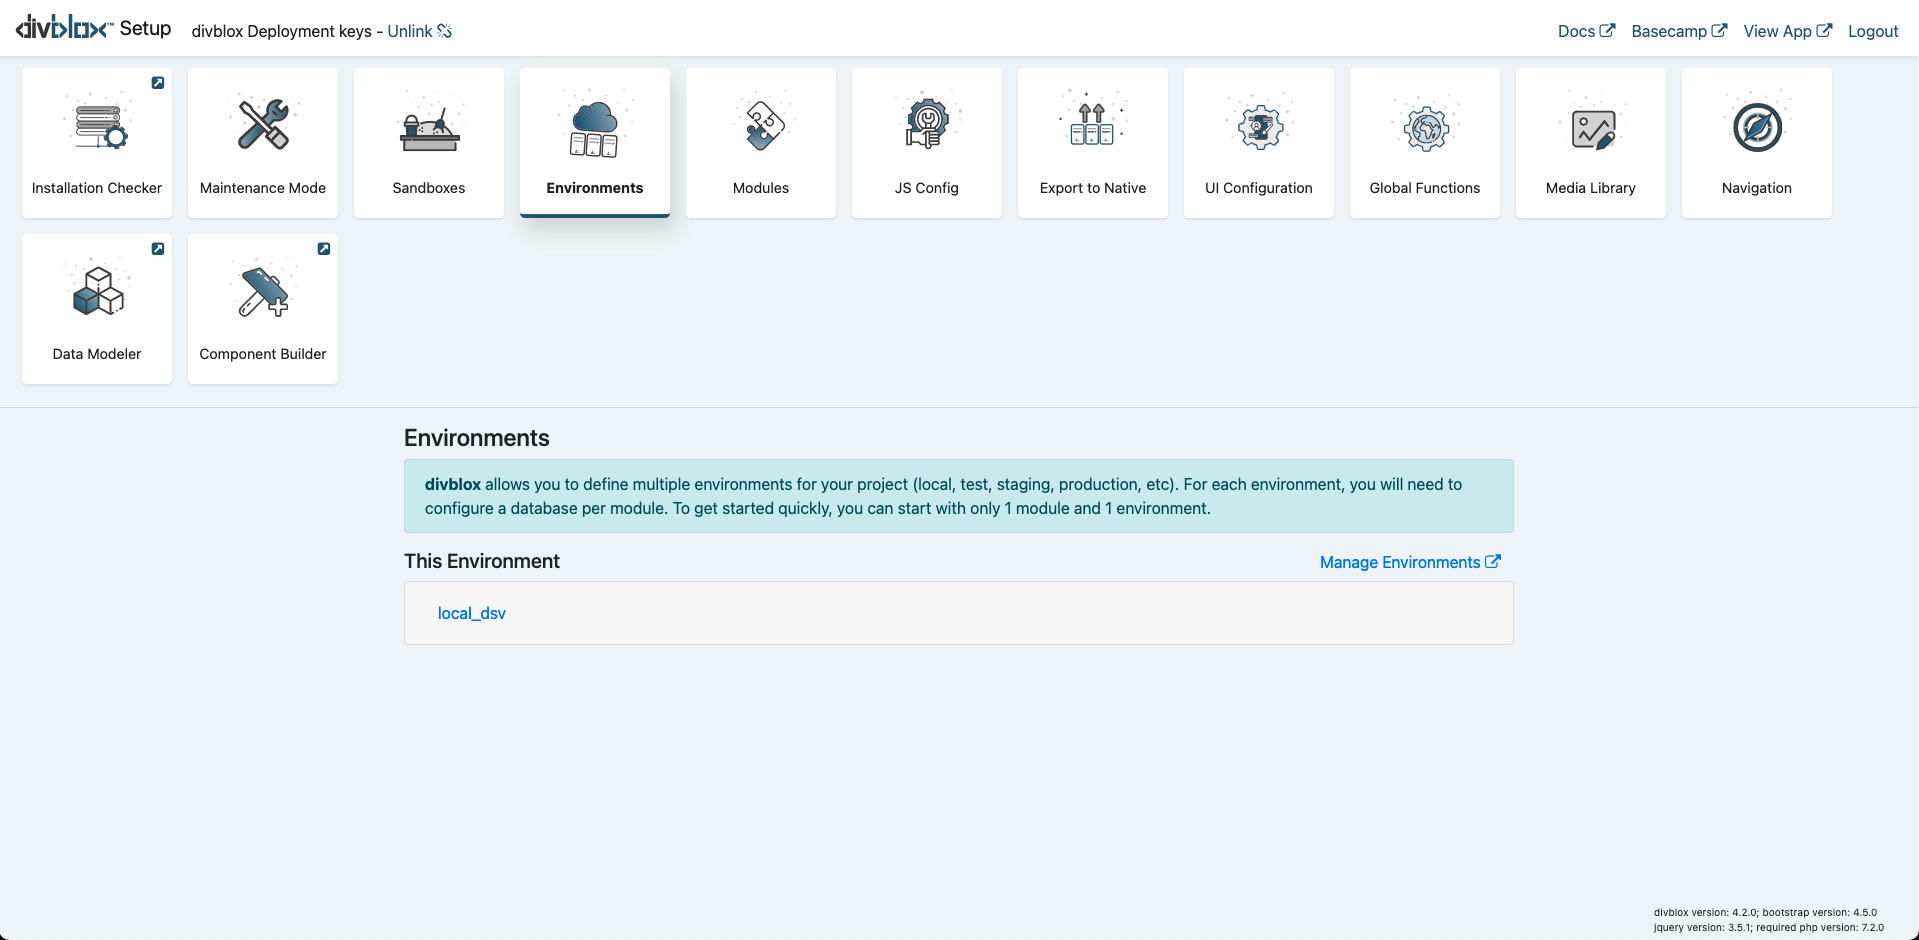
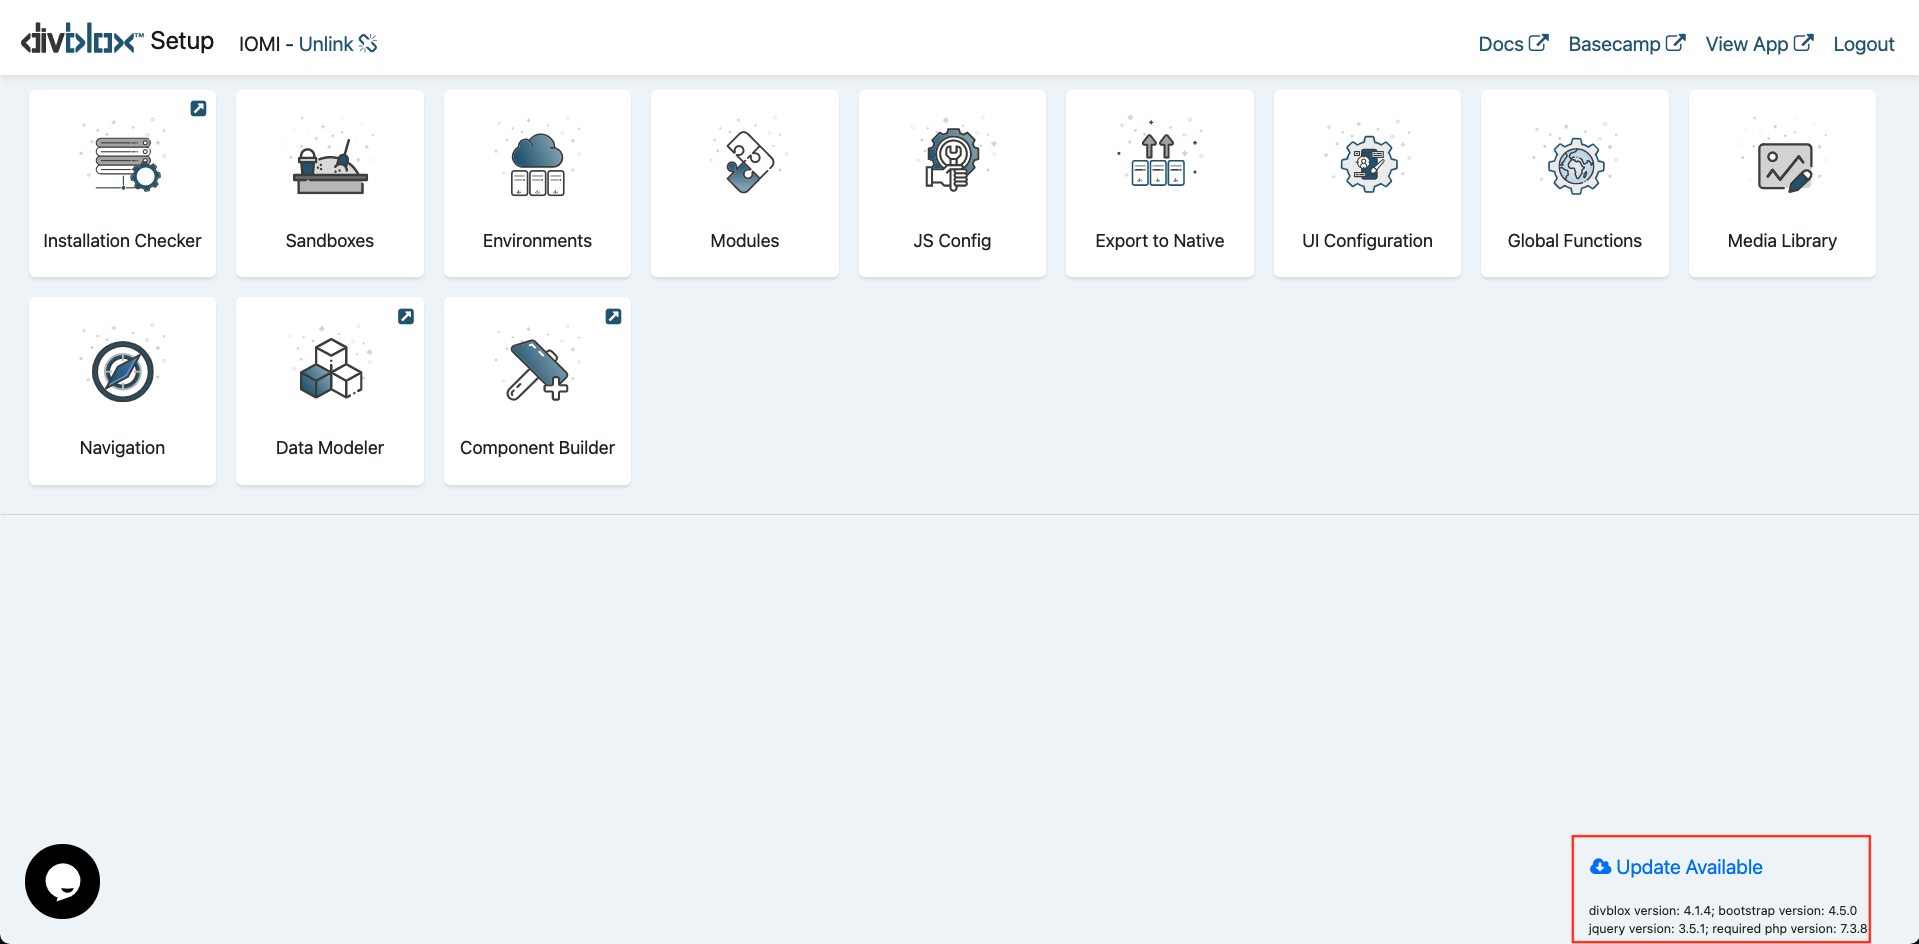
Once you complete these steps successfully you will be logged into the backend of your Divblox project. We will take you through the interface of Divblox's backend and what each part entails. Below is a screenshot of what you should expect upon loading into the Divblox backend. We will first discuss the sections which have more to do with configuration of your Divblox application.
Modules
Divblox allows you to define multiple modules for your project. Modules are useful for grouping related data objects. At least one module (The Main module) is required. Modules are essentially separate databases that ring-fence certain data objects.
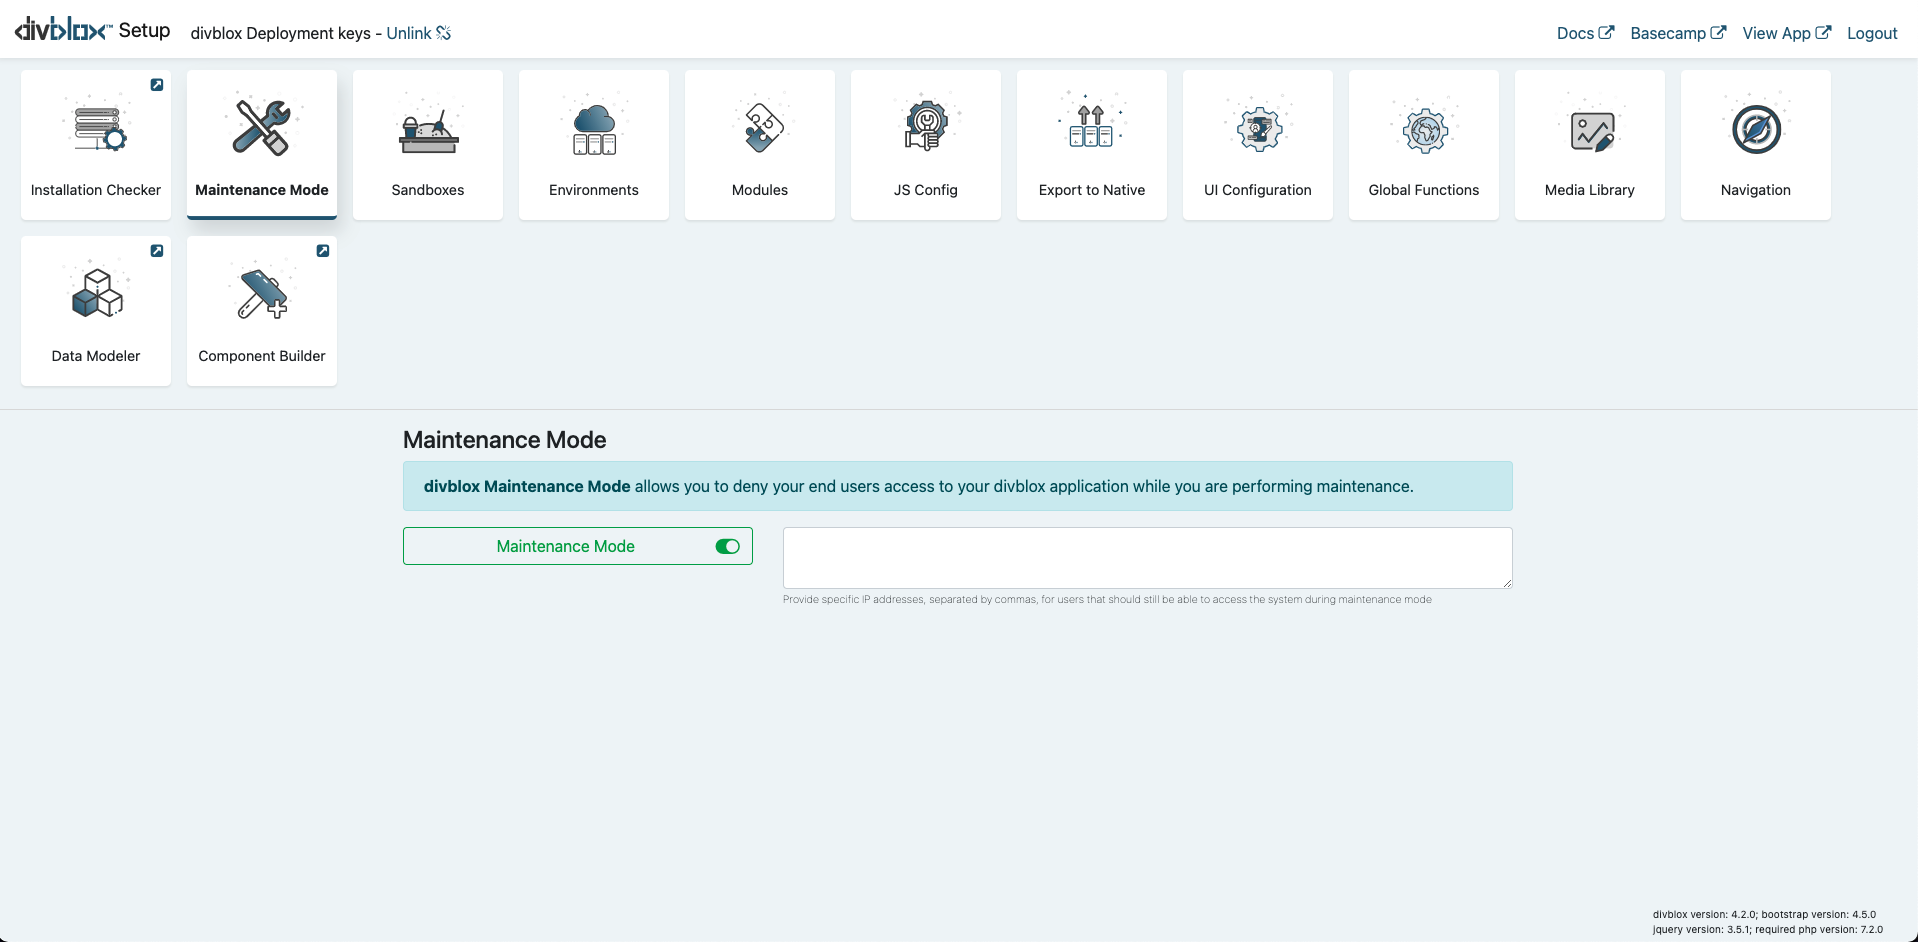
Maintenance Mode
Divblox has a built-in maintenance mode toggle, with the option to whitelist IP addresses, giving them access to the system during maintenance. When maintenance mode is active, access to the system is blocked on component and API level.
Environments
Divblox allows you to define multiple environments for your project (local, staging, testing, production, etc). When you start up Divblox for the first time, it will automatically generate the default (local) environment for your current project.
info
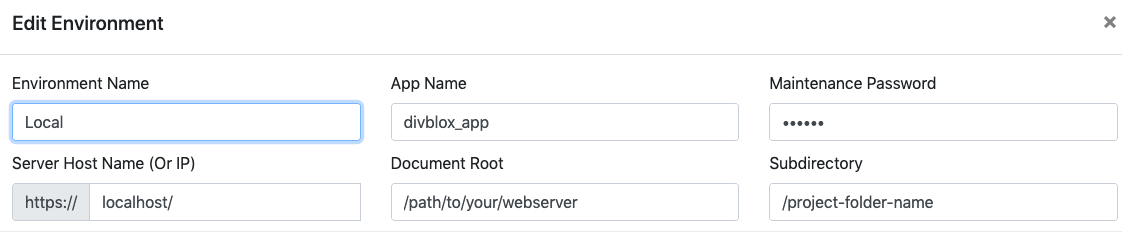
For an environment to function correctly, the following needs to be configured:
- Environment Name - Can be anything. This is just used to identify the environment
- App Name - The name of your app. This will be displayed as the document title
- Maintenance Password - This is a password used internally by Divblox for sensitive operations, for example to drop a database
- The server's host name or IP address - The url or IP address where this environment is deployed
- The document root - The path to your web server's www folder
- Subdirectory - The sub directory in which your Divblox project resides (can be empty)
- The Database configuration for each module - The connection information for every module's database

UI Config
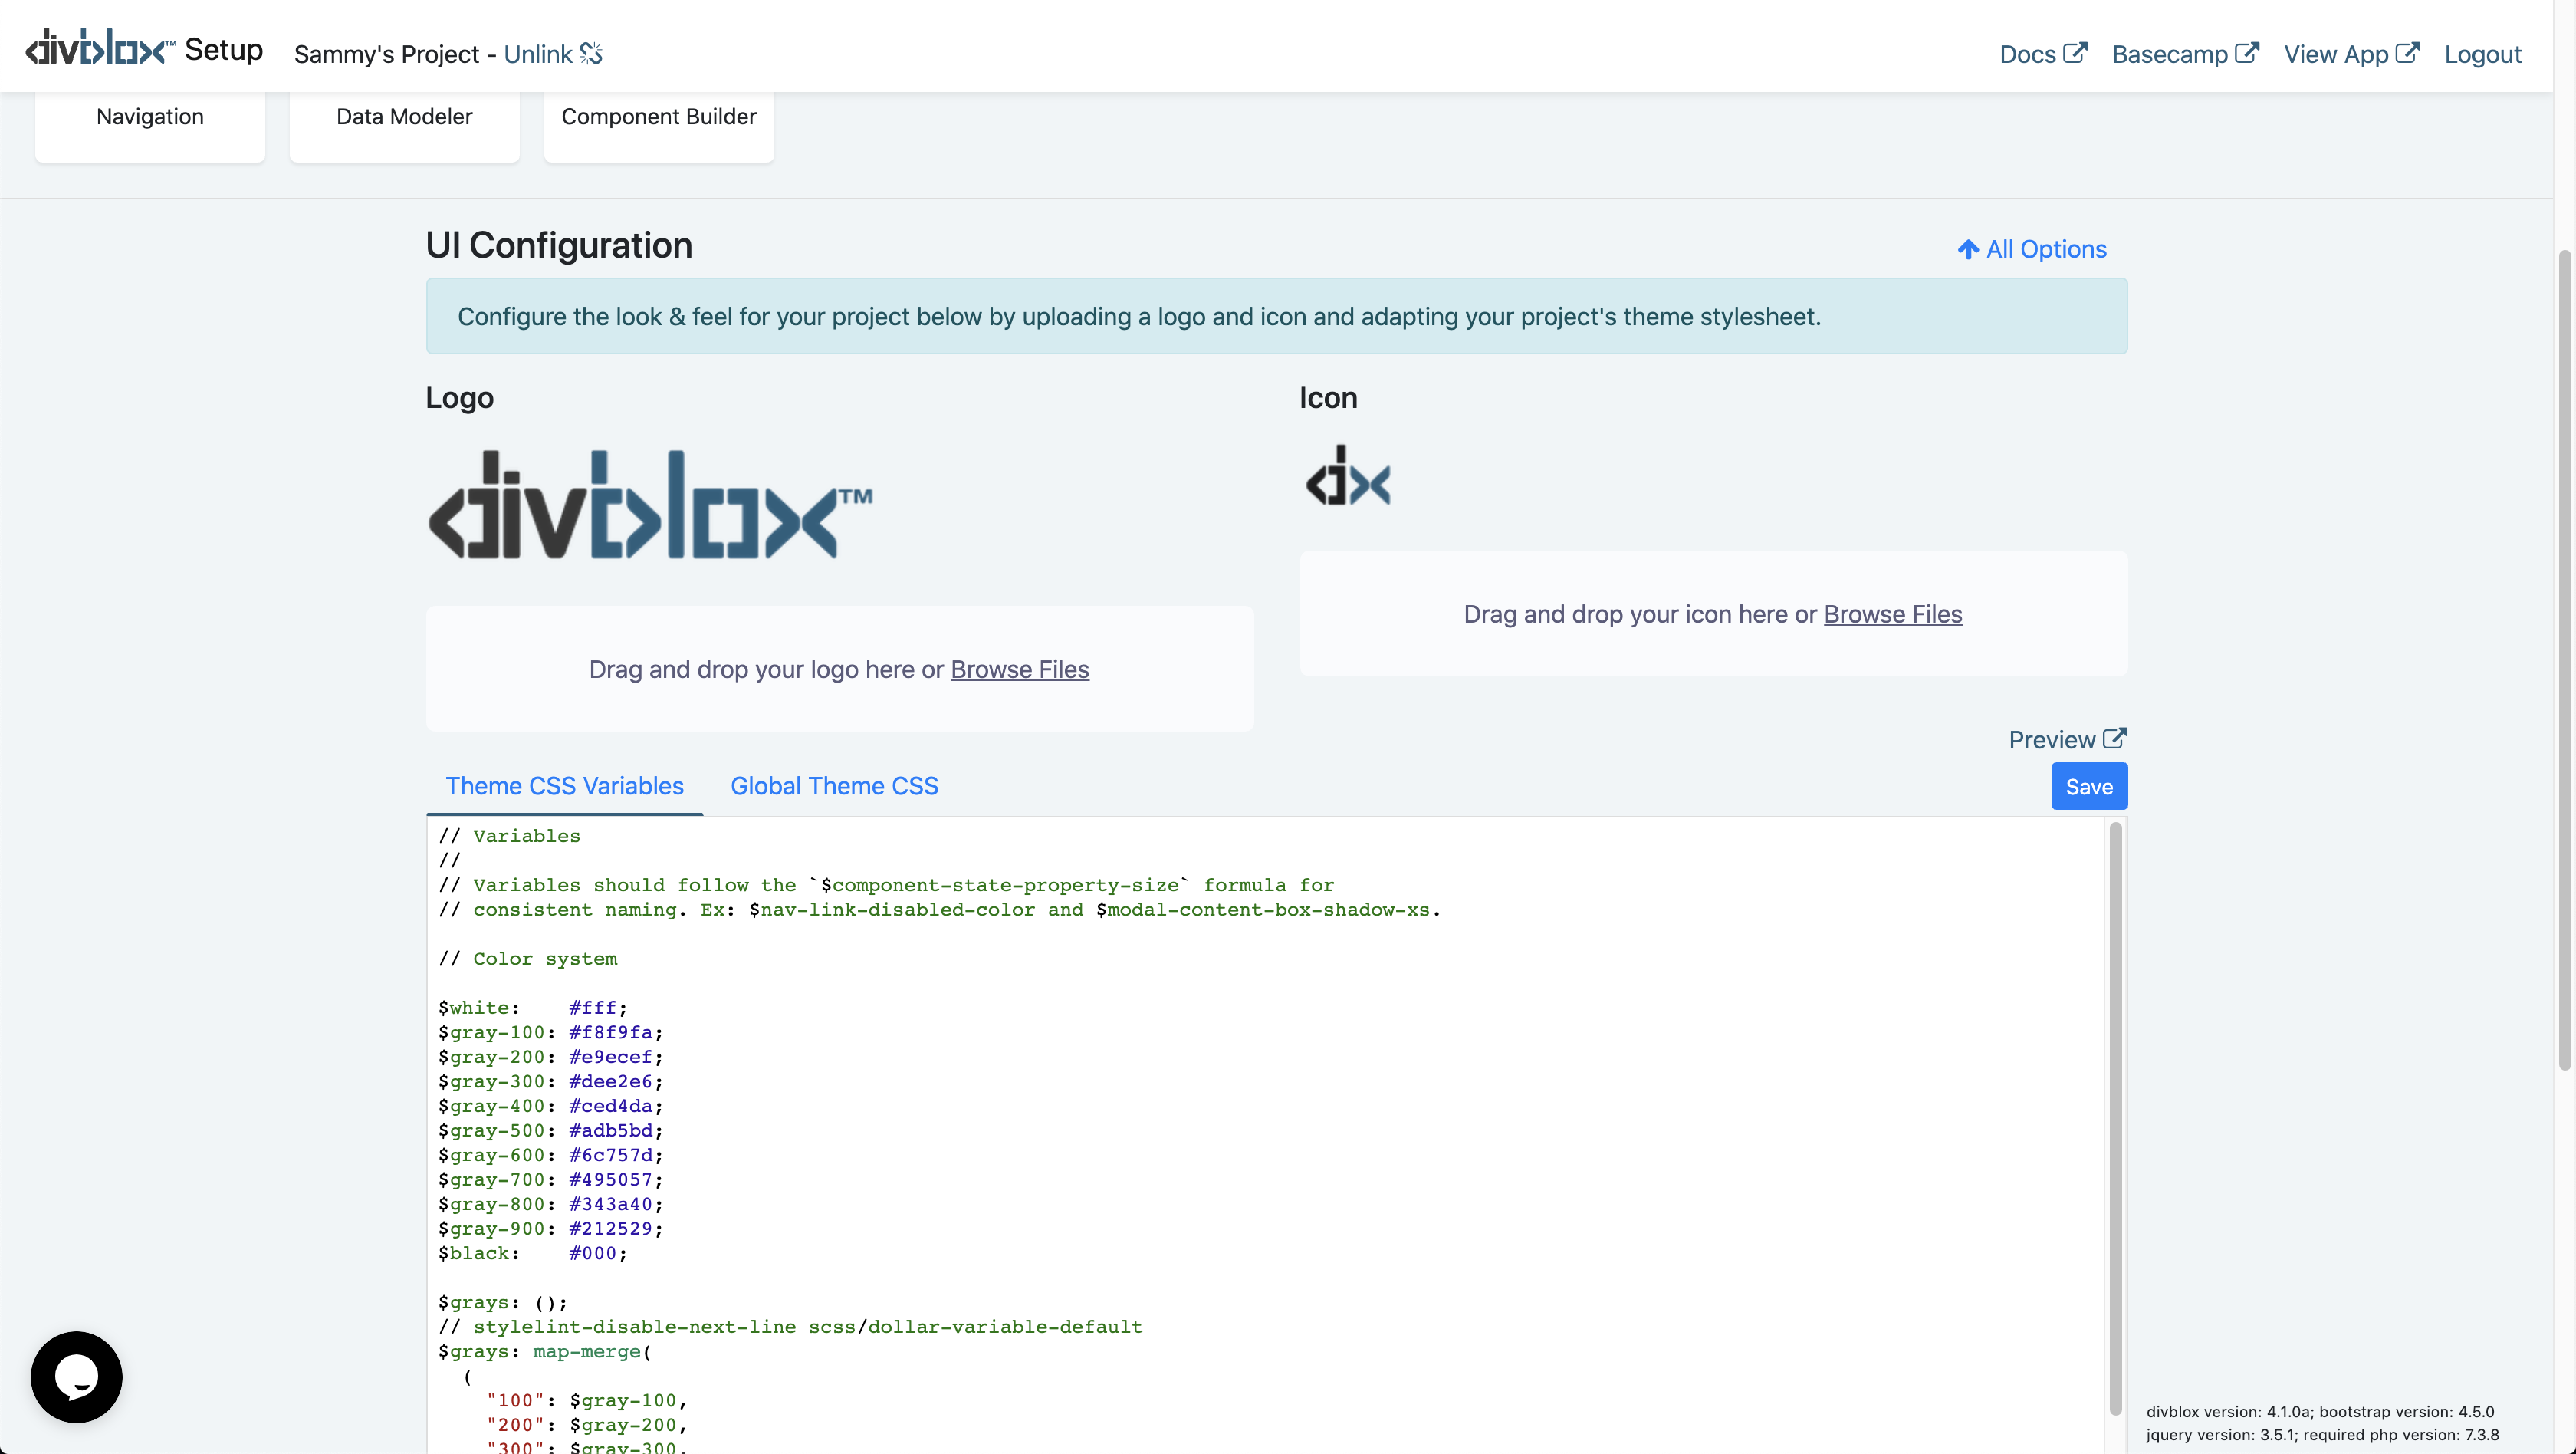
The UI configuration panel gives you quick access to your project logo and icon as well as your projects global theme CSS. Divblox uses SCSS to allow the user
to define variables in the _theme-variables.scss file, and define the global themes in the theme.scss file. These files are located in the 'project/assets/css/scss/' folder.
Upon saving these files in the setup page, the final theme.css file is compiled.
info
Please note that to generate your final CSS you need to click 'save' in the setup page. If you edited the files in an IDE, the changes will only reflect once you have instructed Divblox to compile the CSS.
JS Config
The main configurable items for the Divblox javascript engine can be configured from the JS Config setup block.
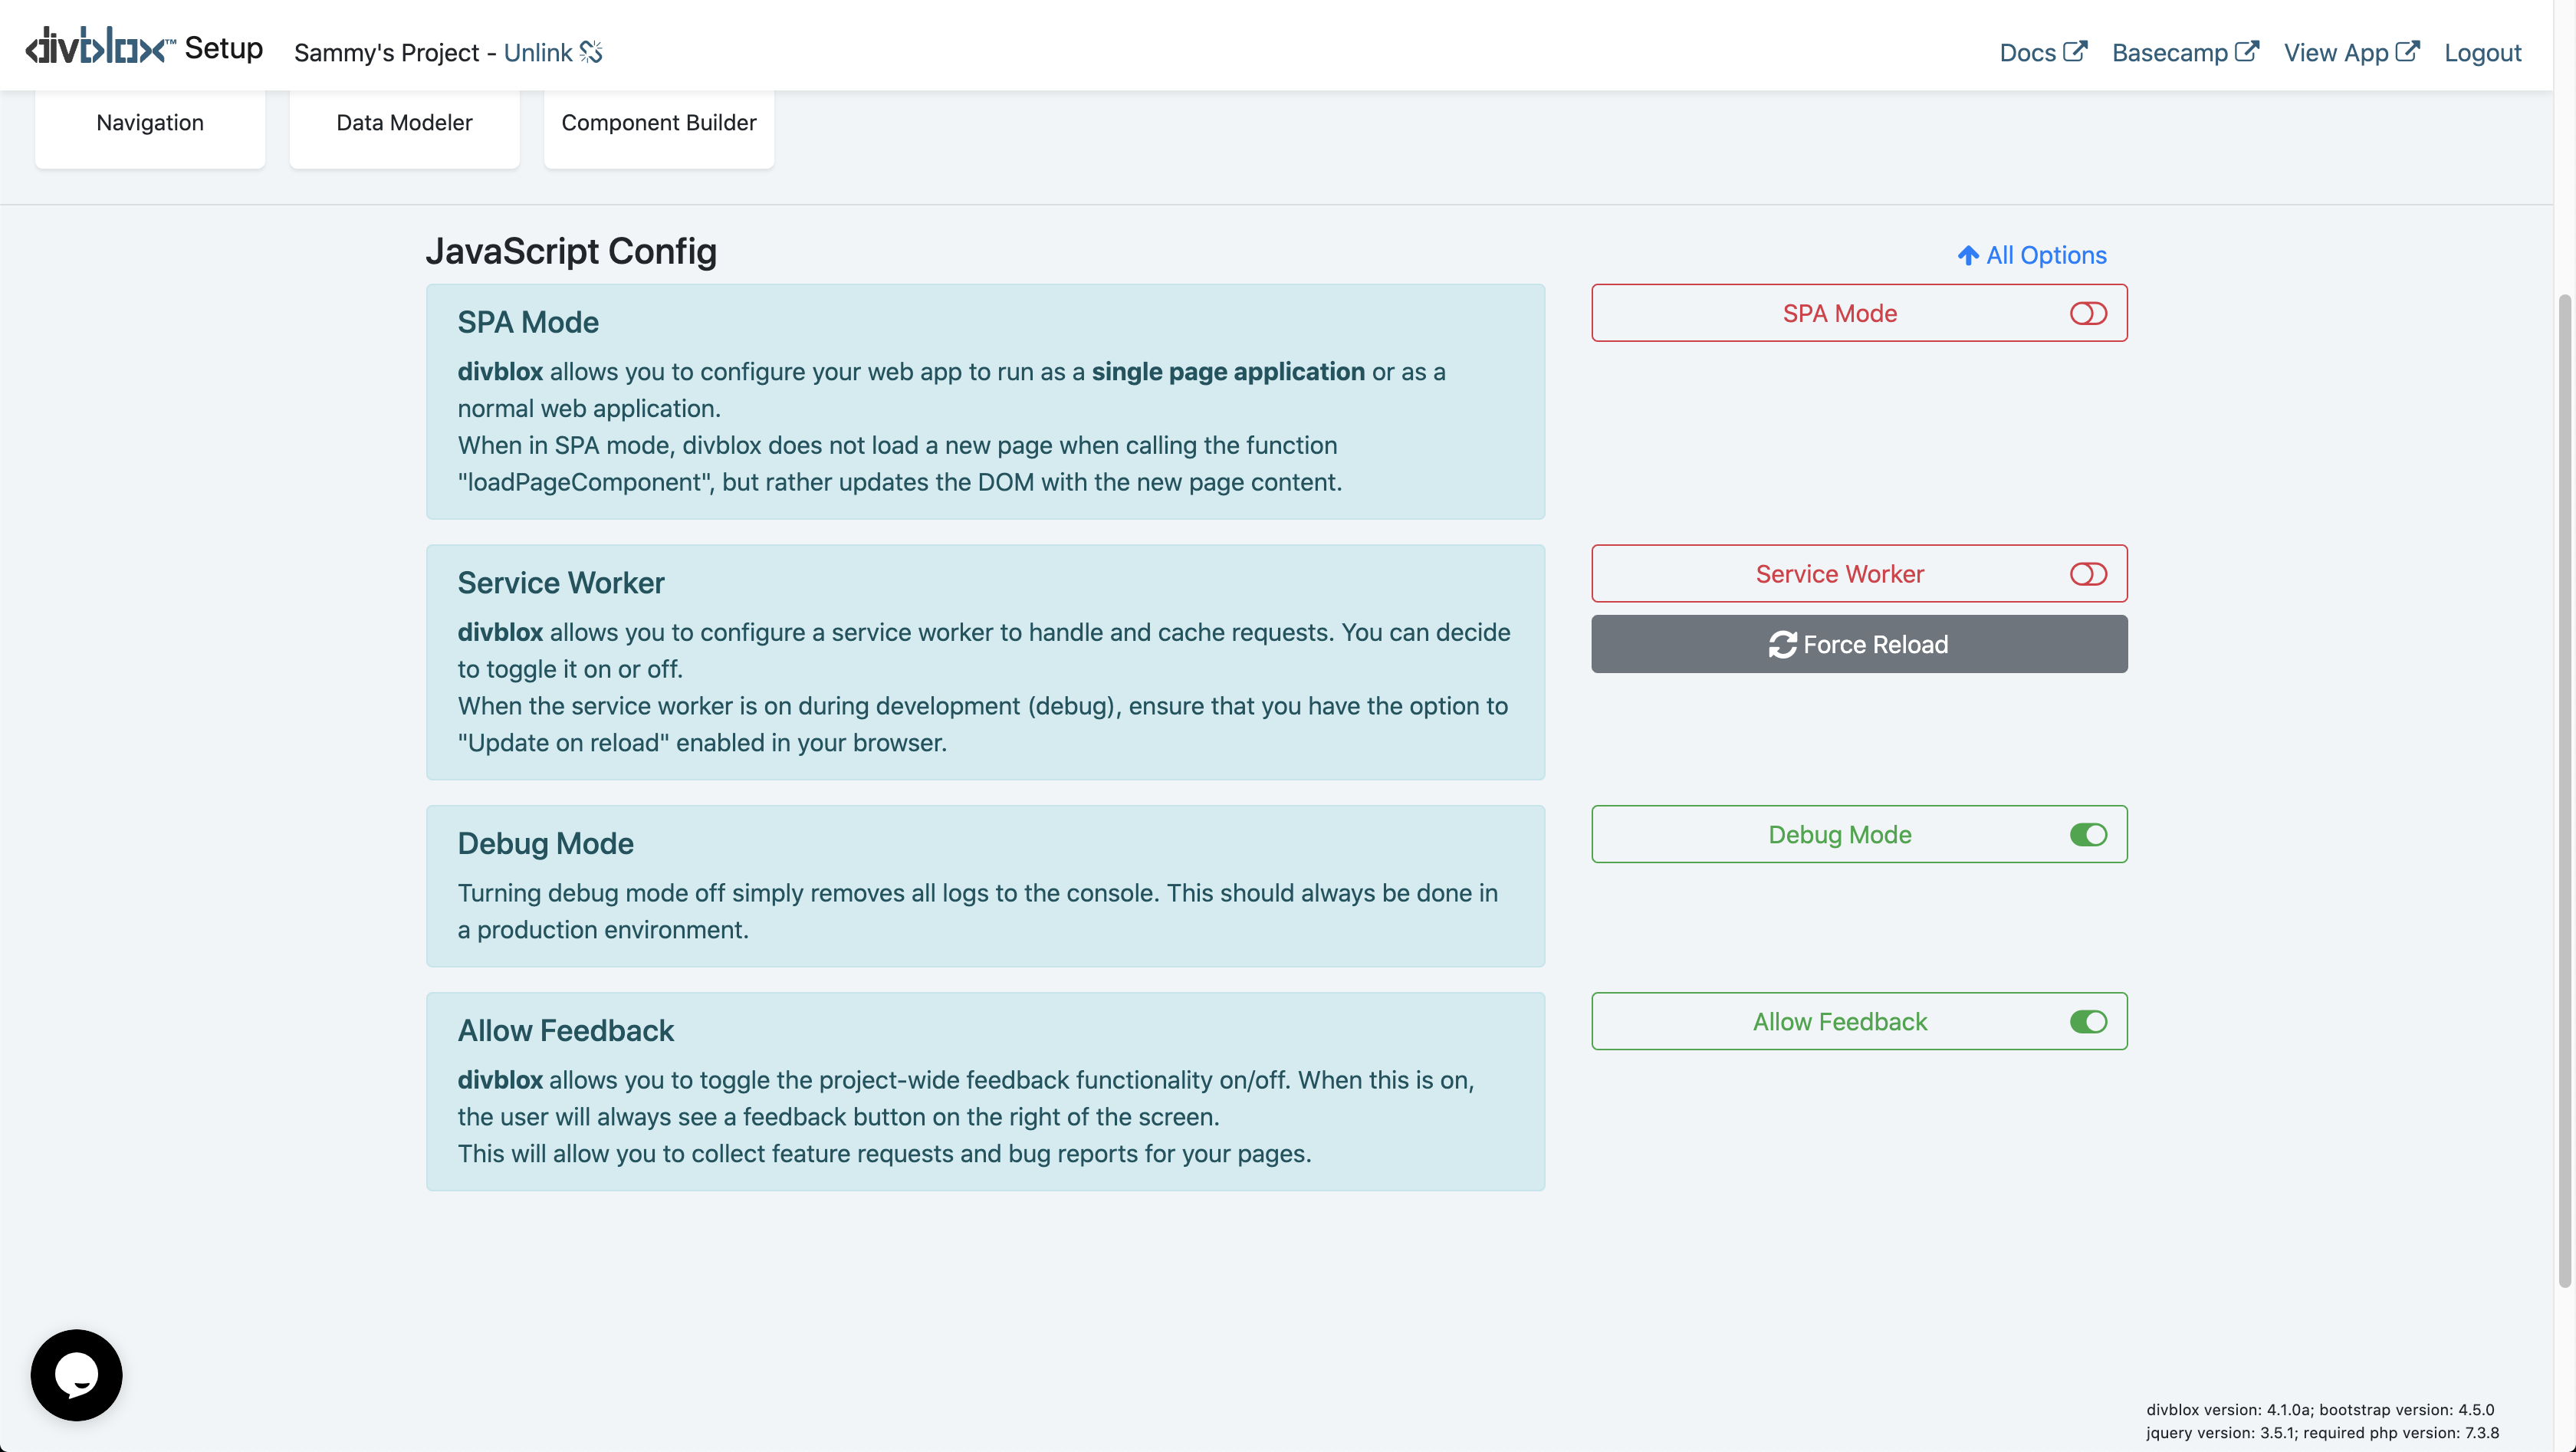
SPA Mode
Single Page Application mode is ideal for apps that will function in multiple forms, from web, to progressive, to native. Divblox allows you to configure your web app to run as a single page application or as a normal web application. When in SPA mode, Divblox does not open a new web page when loading a new page, but rather updates the DOM with the new page content. Divblox also handles the rooting challenges in the background.
info
If you are building for web only, it is recommended to turn SPA mode off.
Service Worker
Divblox allows you to configure a service worker to handle and cache requests. You can decide to toggle it on or off. It is also sometimes useful to force the service worker to reload when assets are modified. The service worker is the premise on which the idea of progressive applications are built. It acts as a form of advanced cache manager allowing offline browsing, push notifications and other 'native app' functionality.
info
When the service worker is on during development (debug), ensure that you have the option to "Update on reload" enabled in your browser. It is recommended to disable the service worker during development, since this can cause assets to be loaded from cache.
Debug Mode
Debug mode enables robust logging of your web application. This is useful when in development mode, but can slow down your app in production environments. Disabling this mode disables the Divblox function dxLog();, removing all development logs with a switch of a button when your app is ready. Debug mode also changes the way the loadComponent() function works: when enabled, all caching is disabled.
info
It is recommended to turn debug mode off for production environments, but to keep it on in local/development environments.
Allow Feedback
Divblox allows you to toggle the project-wide feedback functionality on/off. When this is on, the user will always see a feedback button on the right of the screen. This will allow you to collect feature requests and bug reports for your pages. You can choose to have this enabled for use by end users, but it's strength lies in the fact that it can log the feedback to a specific component on a specific page, allowing developers, testers and the business side of the project to integrate more seamlessly.
info
Feedback is stored at basecamp.Divblox.com. This means that feedback is accessible project-wide, for any environment.
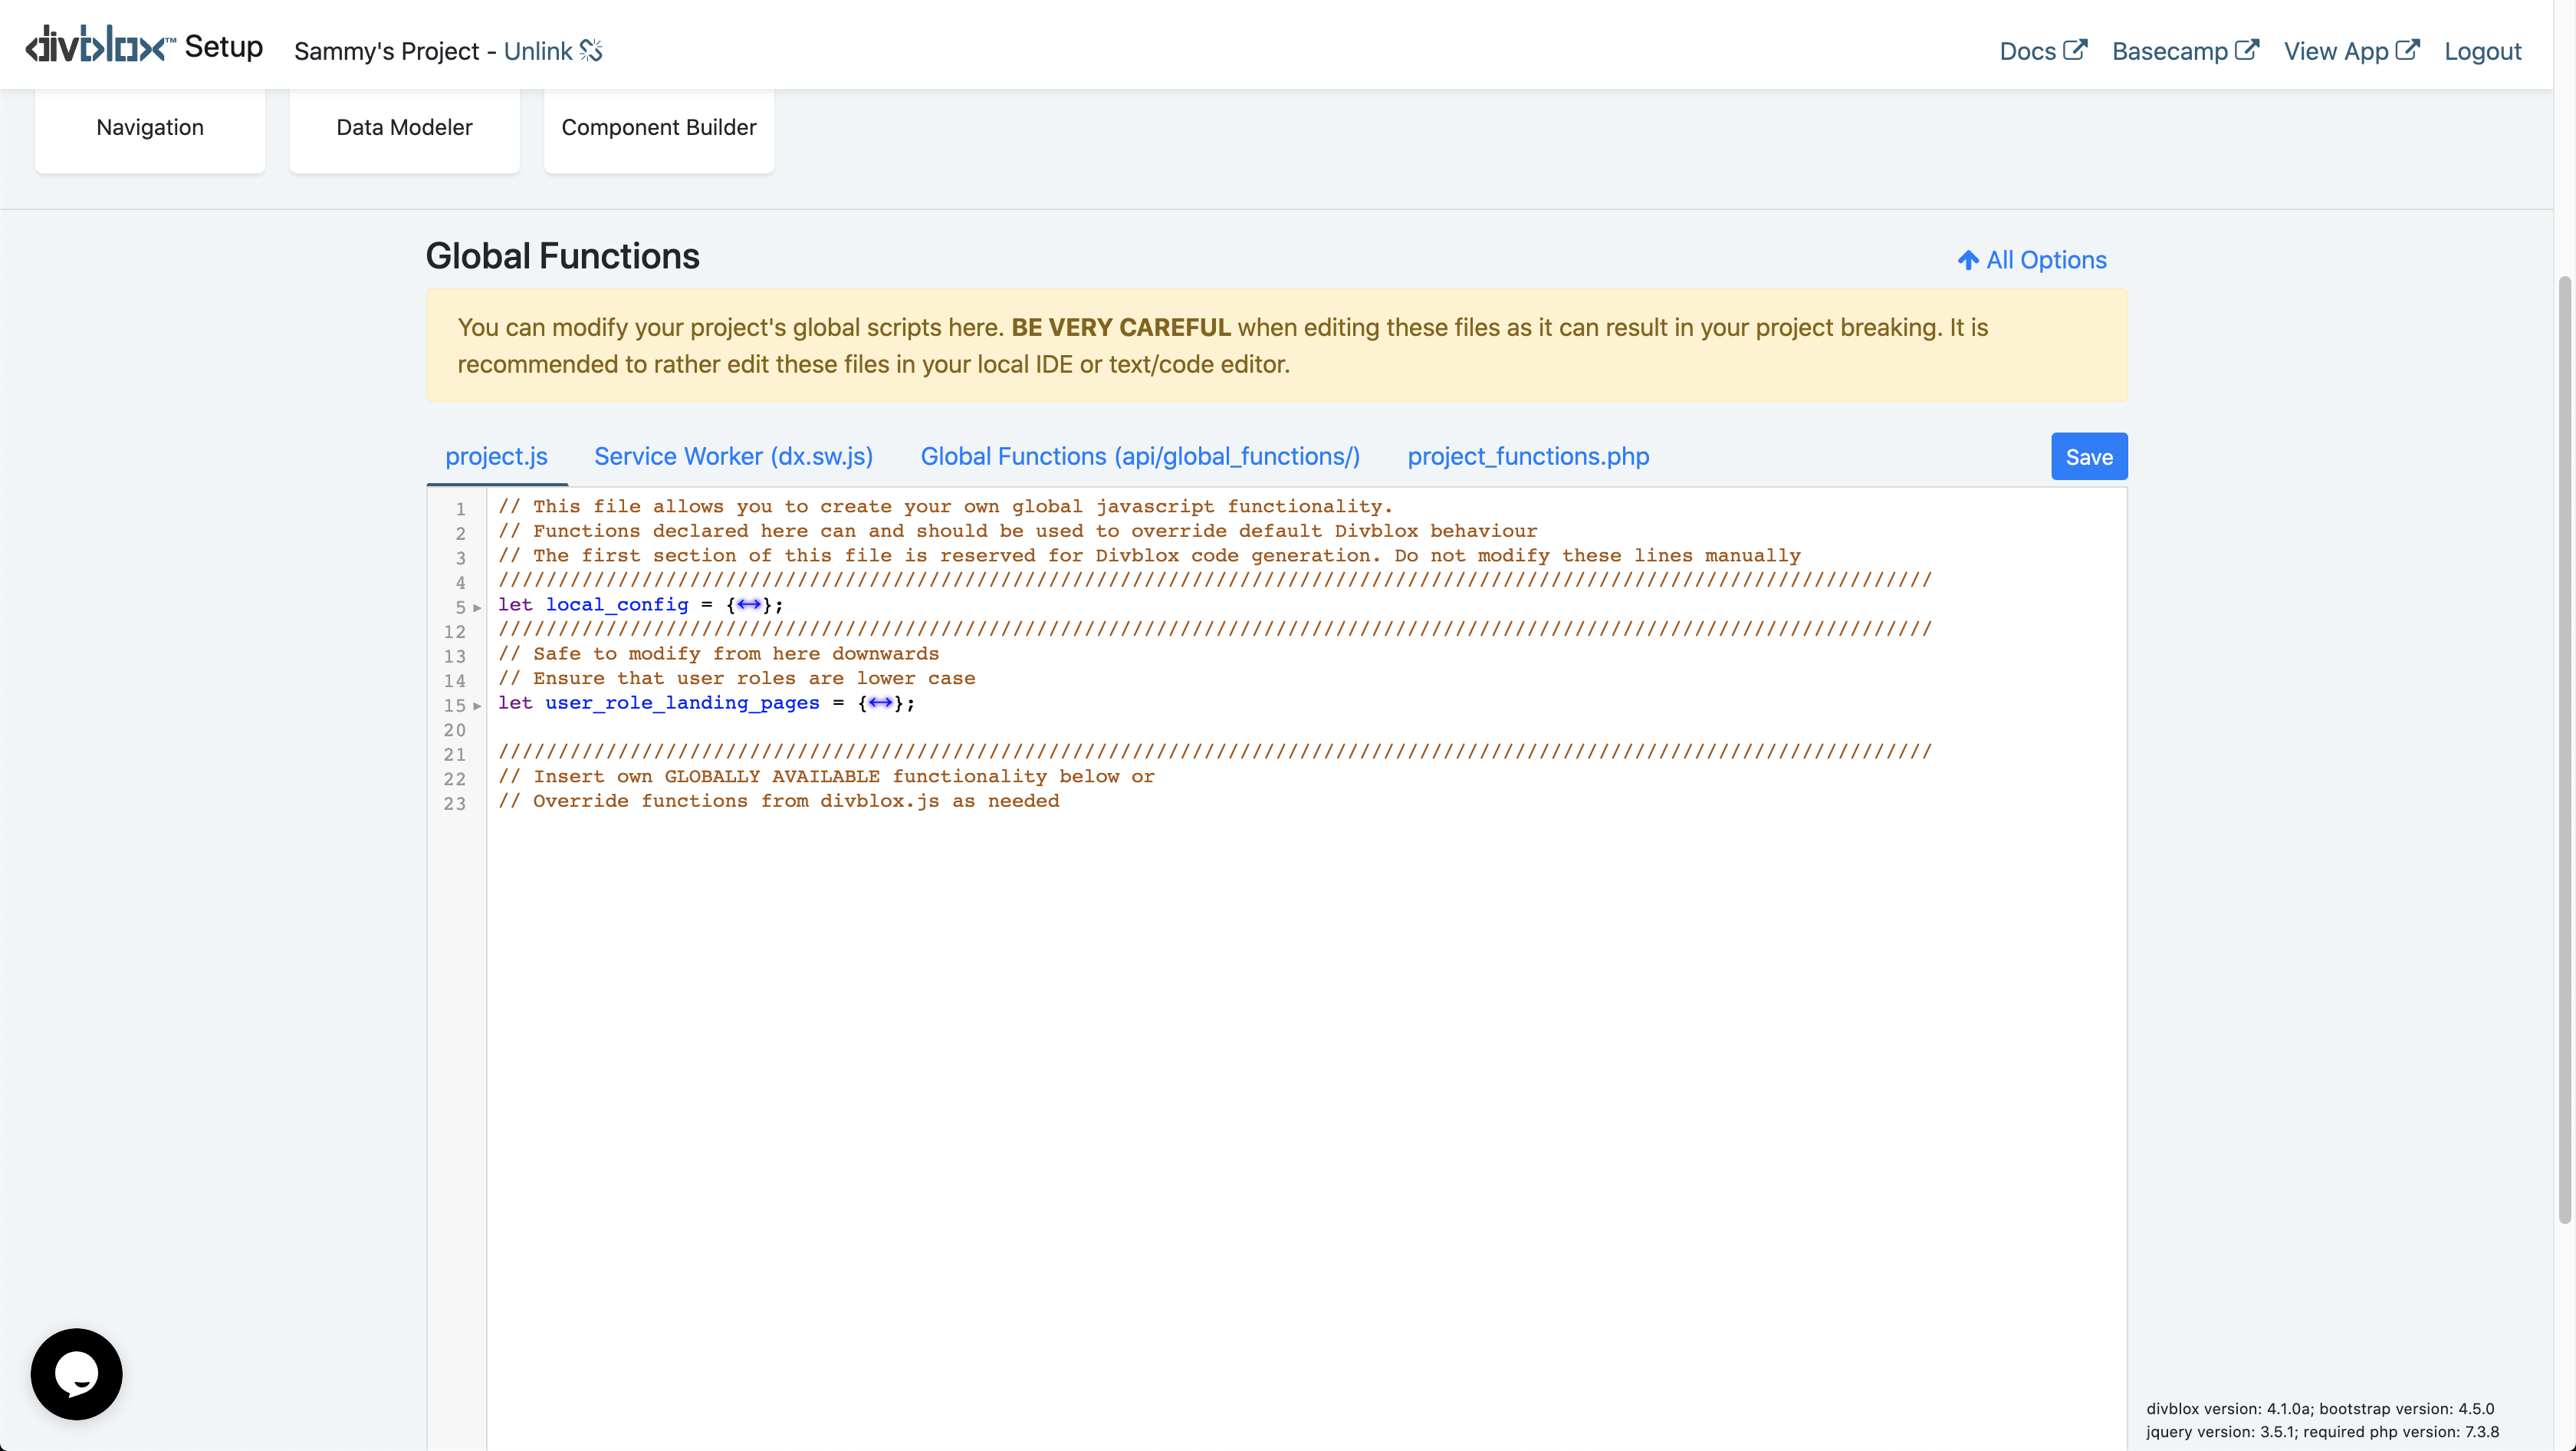
Global Functions
This set of files represents all the functions (set up into classes) that need to be available globally in your project. It is split up into 5 main files, as seen in the screenshot below. This includes both front-end javascript files as well as back-end php files. As mentioned before, whatever is edited in the project folder will override default Divblox functionality. The bulk of your project code will be either in these files, or in component-specific files.
Divblox.js
info
Divblox.js is located at /Divblox/assets/js/Divblox.js
Divblox.js is the main javascript function library that provides all of the core front-end Divblox functionality as globally available functions. It is required for Divblox to run and does the following:
- Manages the core dependencies
- Initializes and prepares the DOM
- Manages the state of your app
- Manages the routing of your app
- Manages the loading of components and component events
- Provides functions for components to communicate with their server side scripts
- Provides various helper functions to simplify your app development
Some commonly used Divblox.js functions are:
info
Divblox.js should not be modified since the framework relies on its integrity. The developer should rather use project.js to override specific functions as required
Project.js
info
project.js is located at /project/assets/js/project.js
project.js is where the developer can add variables and functions that should always be globally available. It is a core dependency for Divblox and is always loaded directly after Divblox.js. This means that it can also be used to override specific Divblox.js functions as required.
Divblox Global Functions
info
The API endpoint for the global functions is located at /project/api/global_functions.php
The main purpose of the global functions is to handle any system-wide server requests. This is very useful when you want to create a general server function that can be reused in multiple places, instead of individually implemented per component. The script should always return a JSON string with at least one parameter called "Result".
You can send a request to this script by using the following snippet:
Project Functions
info
ProjectFunctions is an abstract class that is located at /project/assets/php/project_functions.php
ProjectFunctions is intended to be used as a space where php functions that should be globally available can be housed. It extends the core Divblox class "FrameworkFunctions" that provides many of the core Divblox server side features. This means that you can call the following from any php script the requires Divblox.php:
Project Classes
info
project_classes.php is a collection of globally available php classes and is located at /project/assets/php/project_classes.php.
You can add any custom classes to the project_classes.php script to make them globally available.
The core project classes are:
- ProjectAccessManager, which extends AccessManager and is responsible for managing access to components and objects, based on the currently logged in user
info
By default, component access is open to ANY user to allow the developer to get started quickly. This should be removed
as soon as possible to enforce proper security for your solution:
- ProjectComponentController, which extends ComponentController and allows for component php scripts to function correctly
- FileUploader, which deals with storing files as data objects once they are uploaded to the server
- PublicApi, which extends PublicApi_Base and provides the outline for how to expose a Divblox api via an endpoint
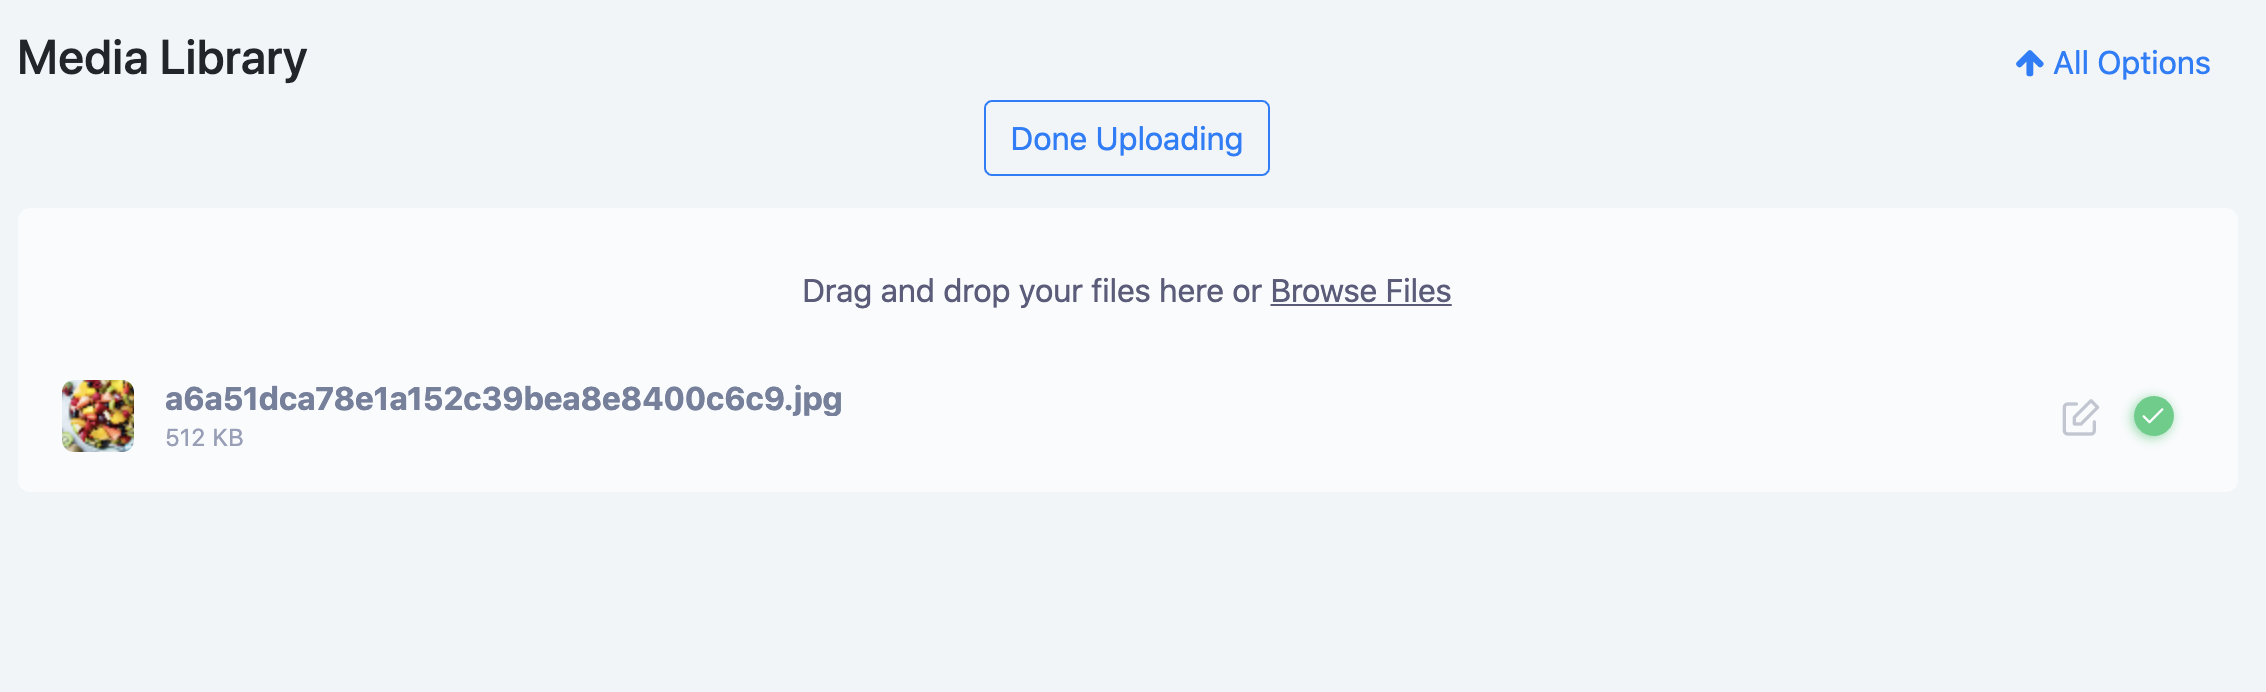
Media Library
This is a visual tool to help with importing media for those who prefer a 'drag and drop' approach.
- Uploading a file
- Editing an upload
- Upload info
Navigation
Divblox tries to simplify the generic processes of app creation as much as possible. As such, the navigation tab is where you can create menus which can be later placed into navigation components across your project easily. Below is a screenshot of how to use the navigation tab in the setup page. Menus are defined here, and later placed into navigation components.
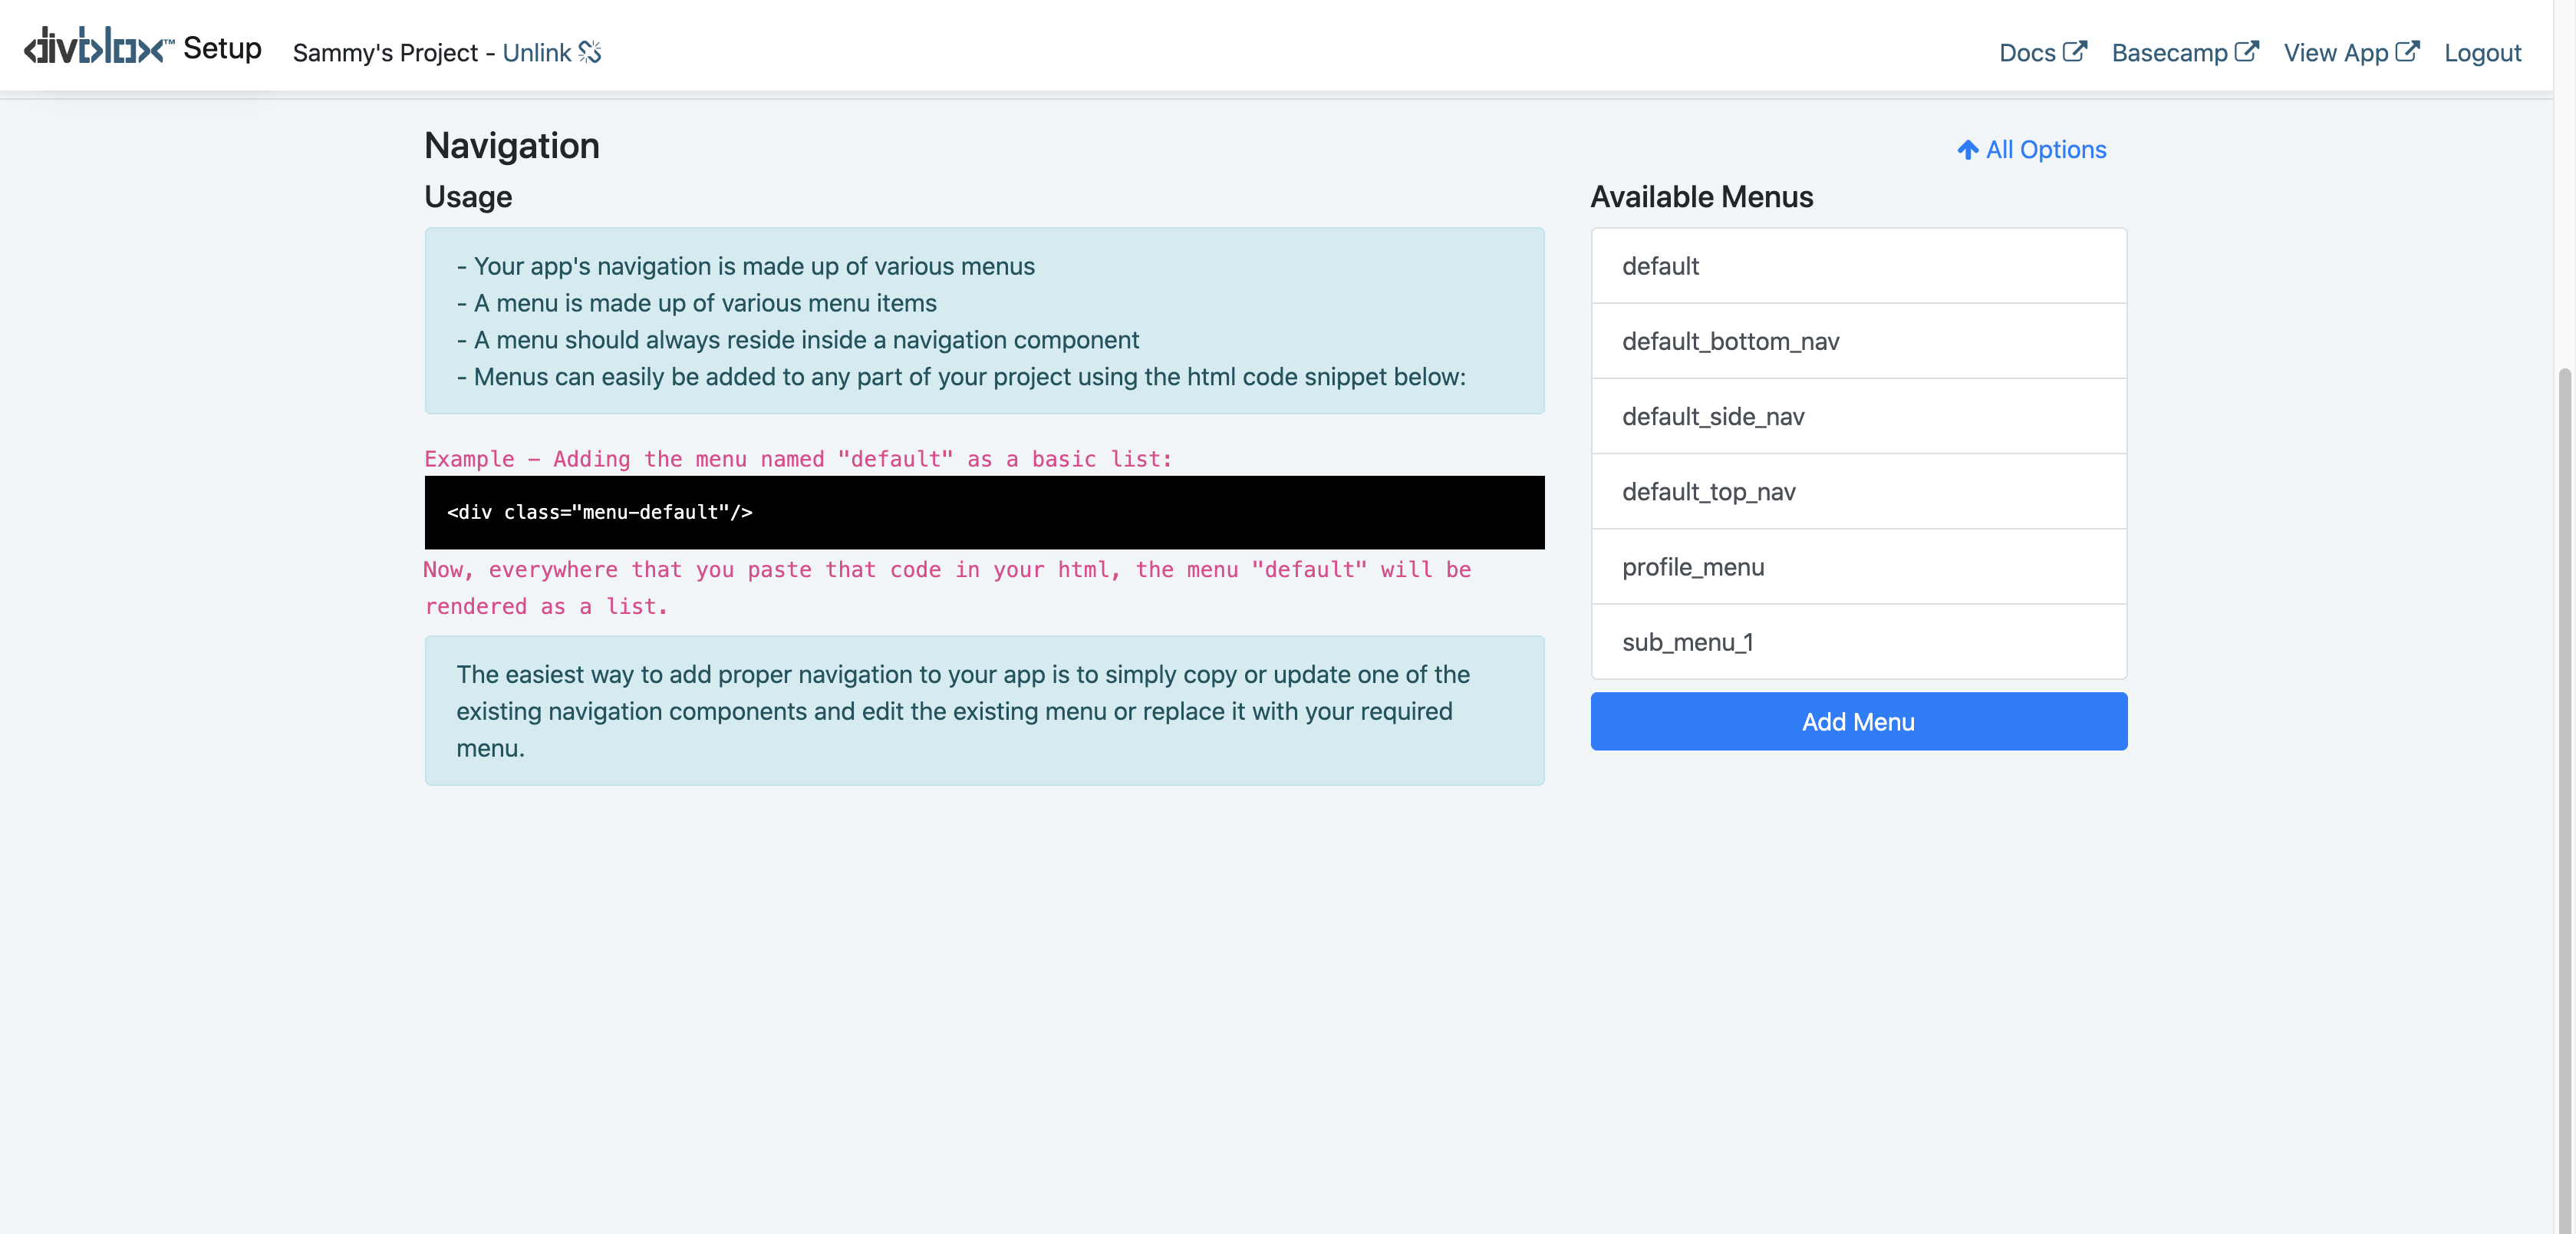
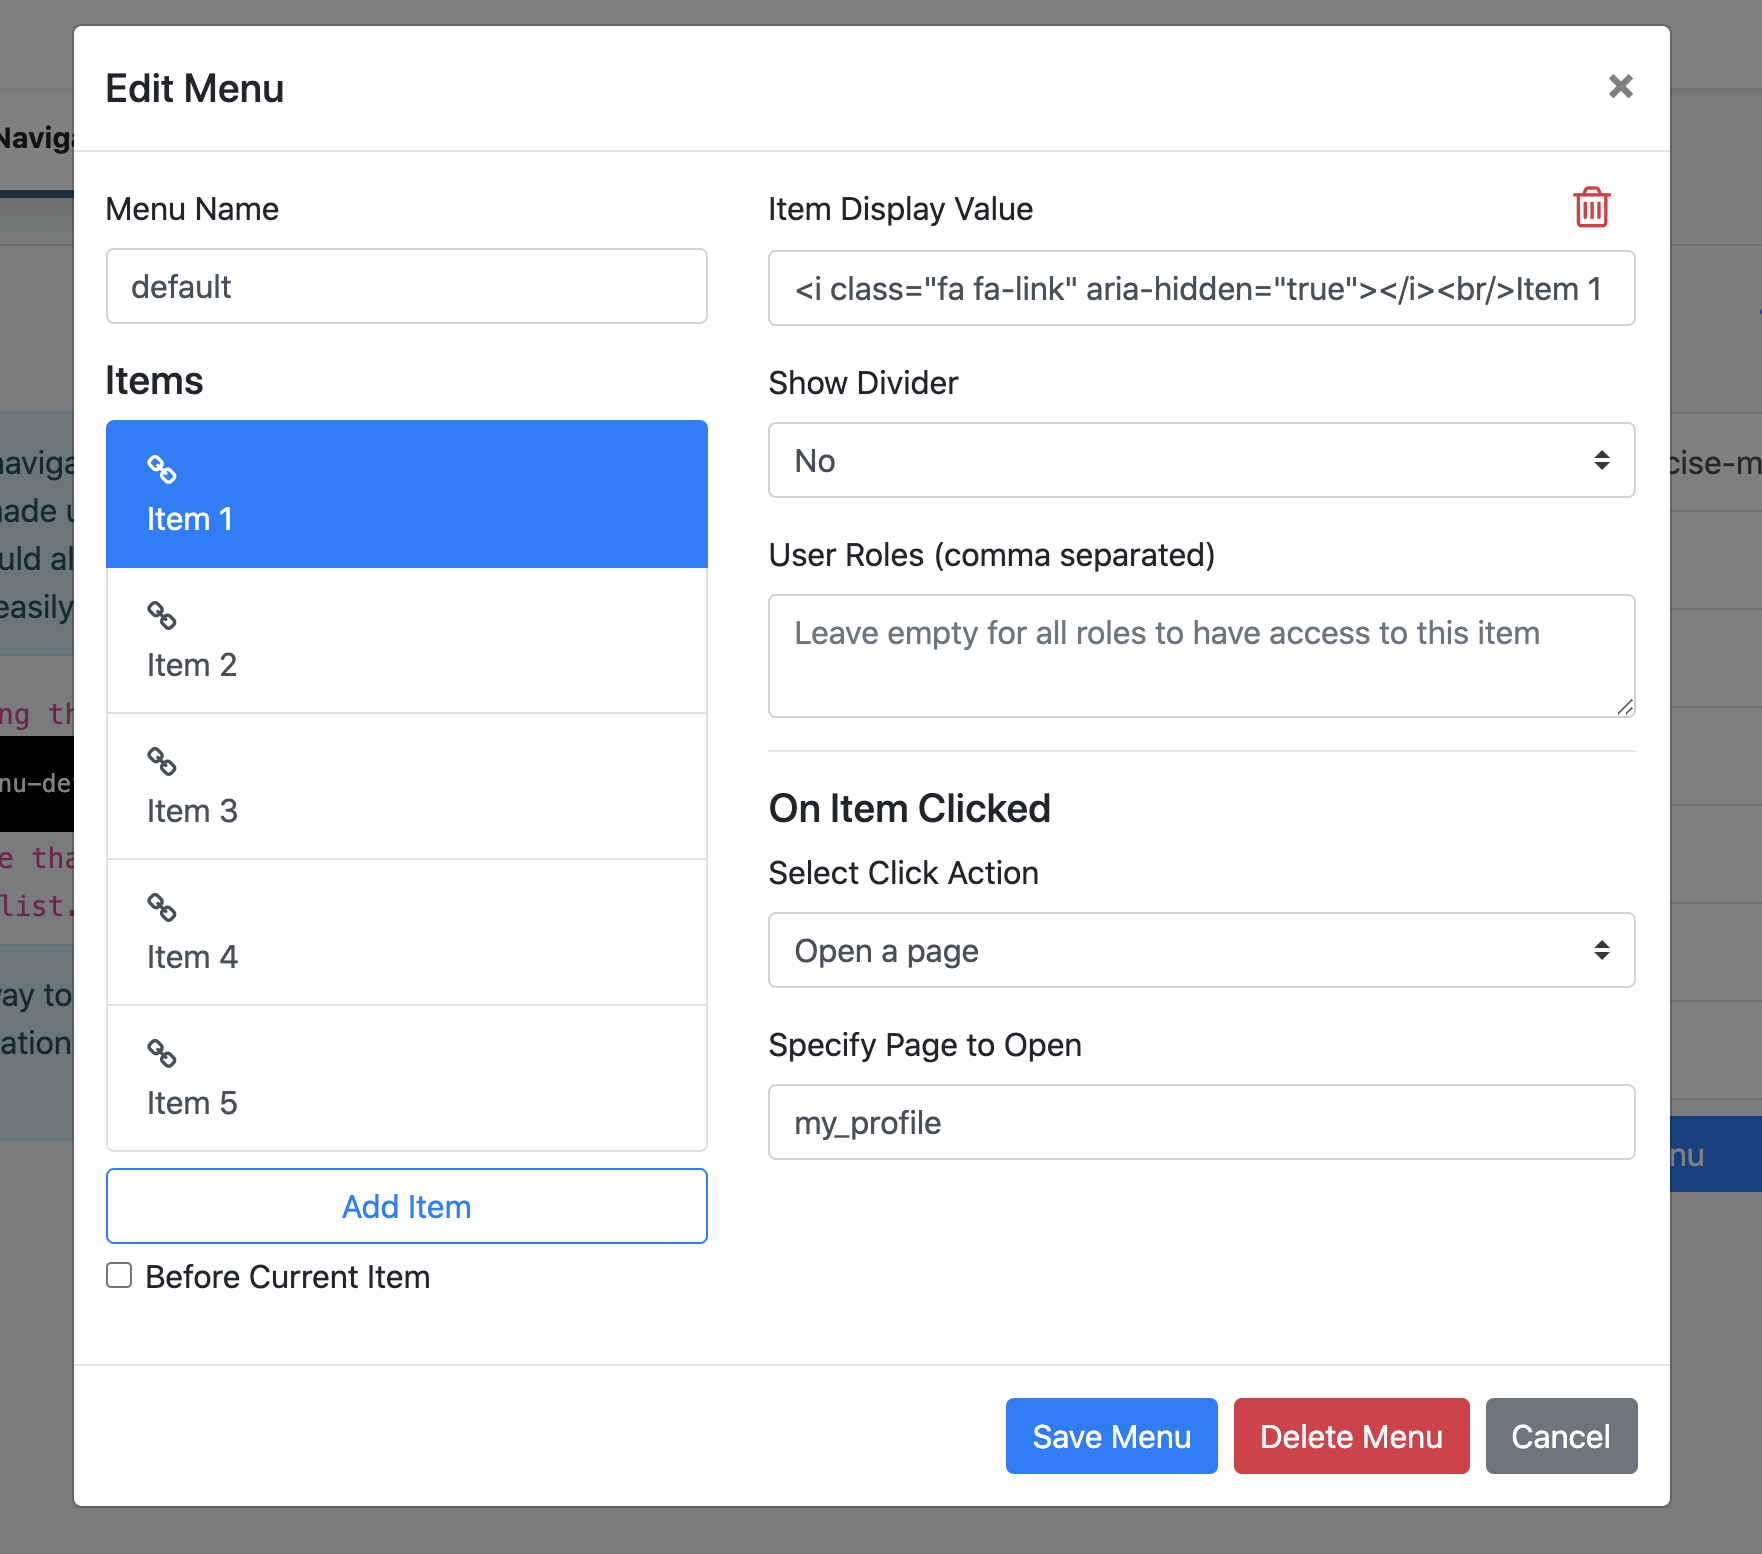
You can create the menus here, defining how many navigation items you have and what text and/or icons are displayed.
It is then as simple as editing the class name in the navigation component to include or remove any project-wide menu you have created.
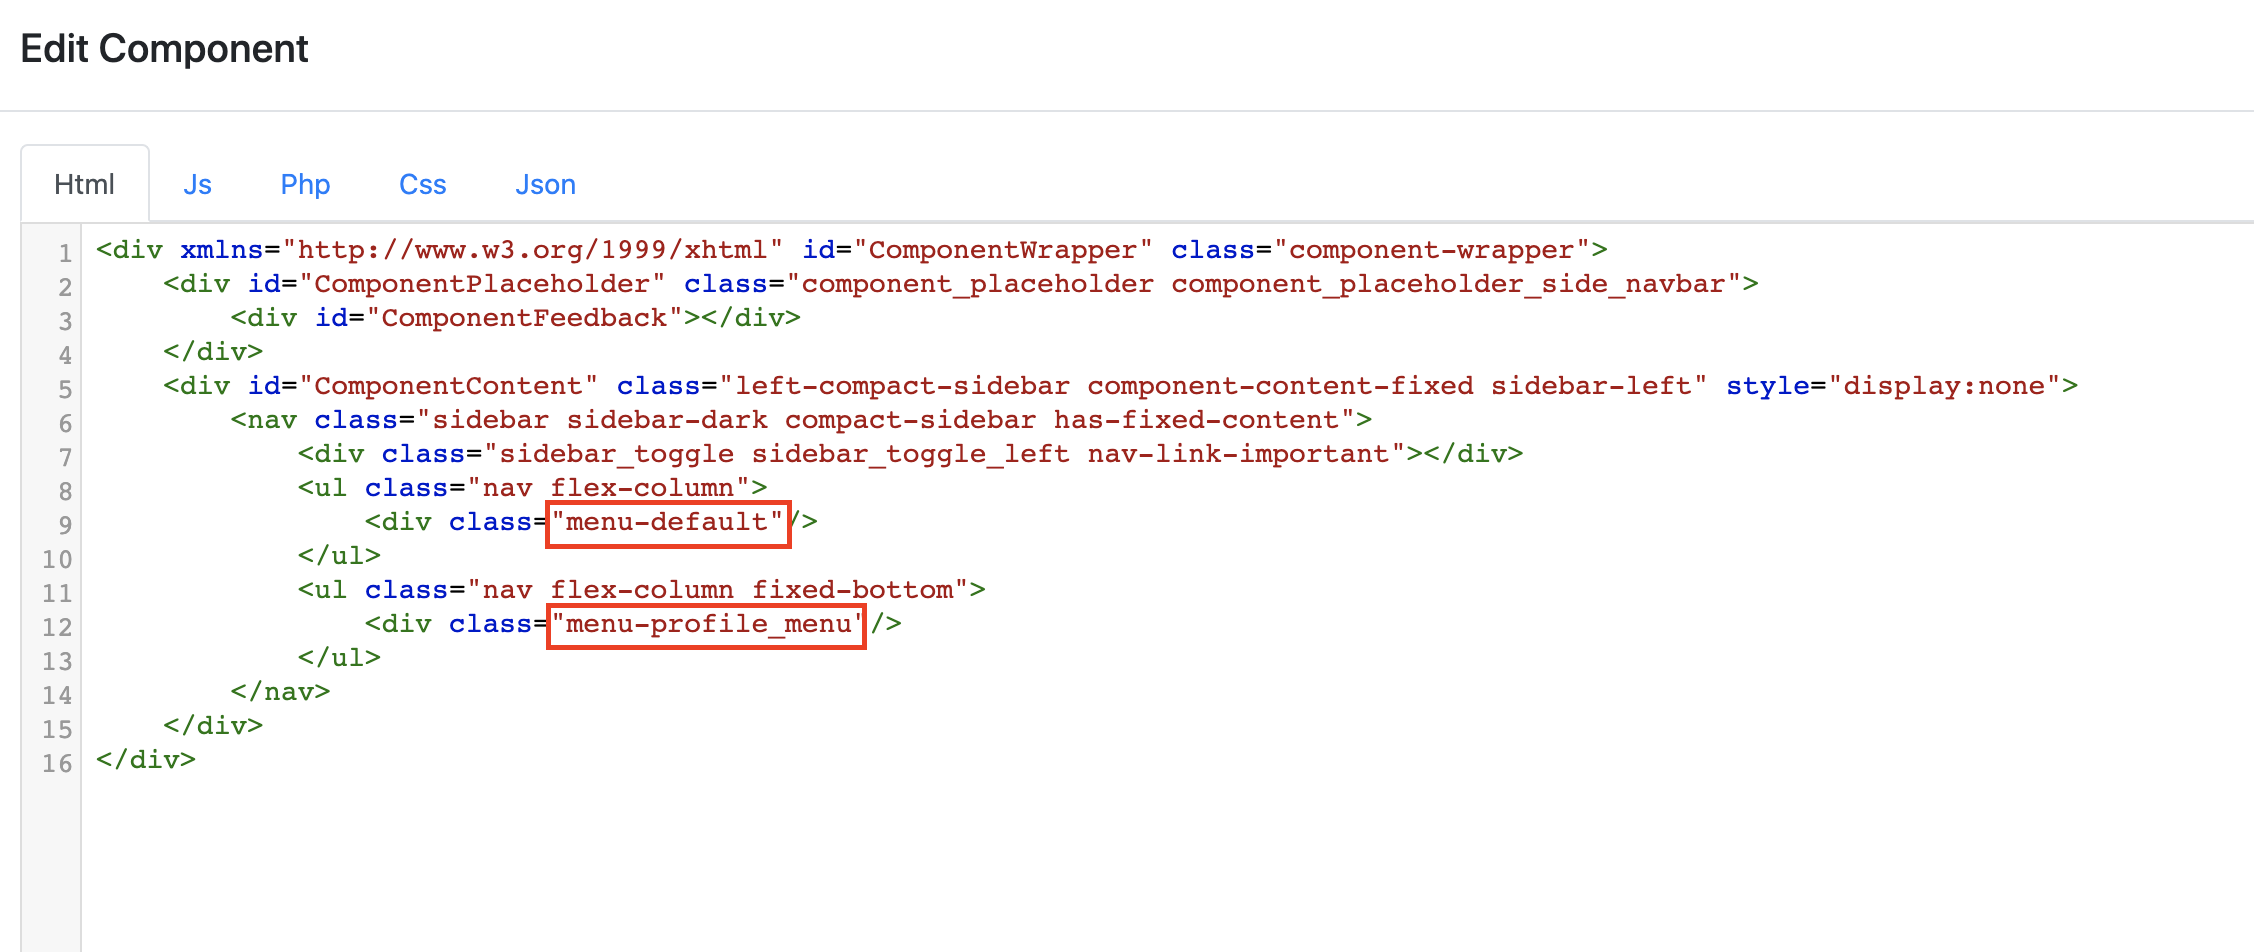
The suggestion approach to handling navigation components is as follows:
- Create your desired menu (via navigation tab in setup page).
- Pick a suitable navigation bar and duplicate it using the component builder (naming it according to your project).
- Edit the classname in your newly created navigation component to
menu-your-menu-name.
Duplicating the navigation component is suggested so that the default navigation remain as templates. More importantly, this means that if any future Divblox updates change the default navigation, your project will not be affected.
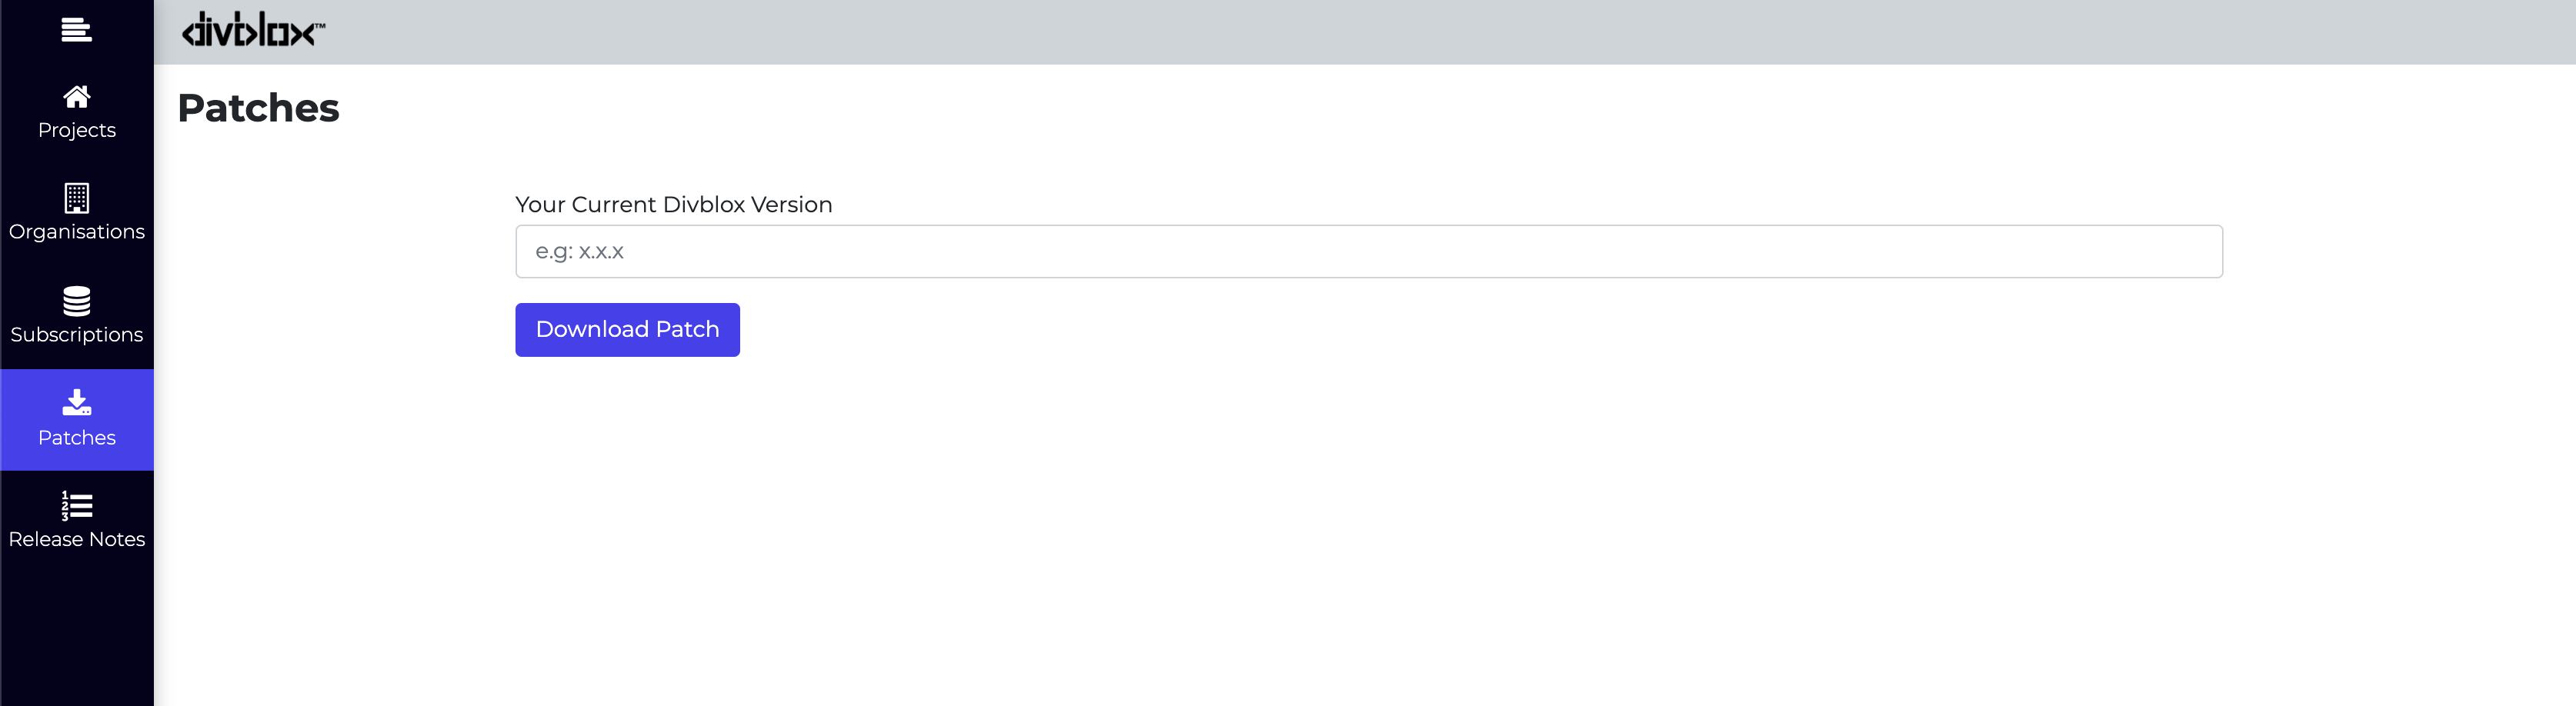
Updates
When Divblox updates become available, you will be notified in the bottom right corner of the setup page.
To prevent unexpected data loss, it is important to understand how the Divblox auto-updater works. When the auto-updater is run, core Divblox files will be replaced on your local machine with newer versions. This is why it is highly encouraged to leave Divblox-specific files untouched and use project-specific files to override any functionality. This is also a good time to stress the importance of using some sort of version control system like git to make sure that you have the ability to revert unintended changes.
For users who would like to review each file change, or if the updater seems to not be working, you can update Divblox using a patch. This is found in basecamp. All that is required is for you to enter your current Divblox version. A zipped patch file will then be downloaded containing only the files changed between your version and the current version.